In this article:
- Overview
- Accessing the AI EDI Mapper in the Custom Mapping Tool
- Creating an EDI Mapping With the AI EDI Mapper
- Editing the Custom Mapping
- Editing the Flow Configuration Settings
- Viewing Files in the Library
- Attached Files Referenced in the EDI File Types Table
Overview
The AI EDI Mapper helps you create and configure EDI mappings for your business processes. EDI mappings allow you quickly create the associated mapping, Flow, and library entries within a single window of the Chain.io platform. in one step.
The AI EDI Mapper currently enables you to create inbound EDI mappings. This means that in the Flow configuration, the EDI file is the source file and data will be converted to another file type of your choosing.
For more information on the custom mappings, refer to the following support articles:
Process Summary
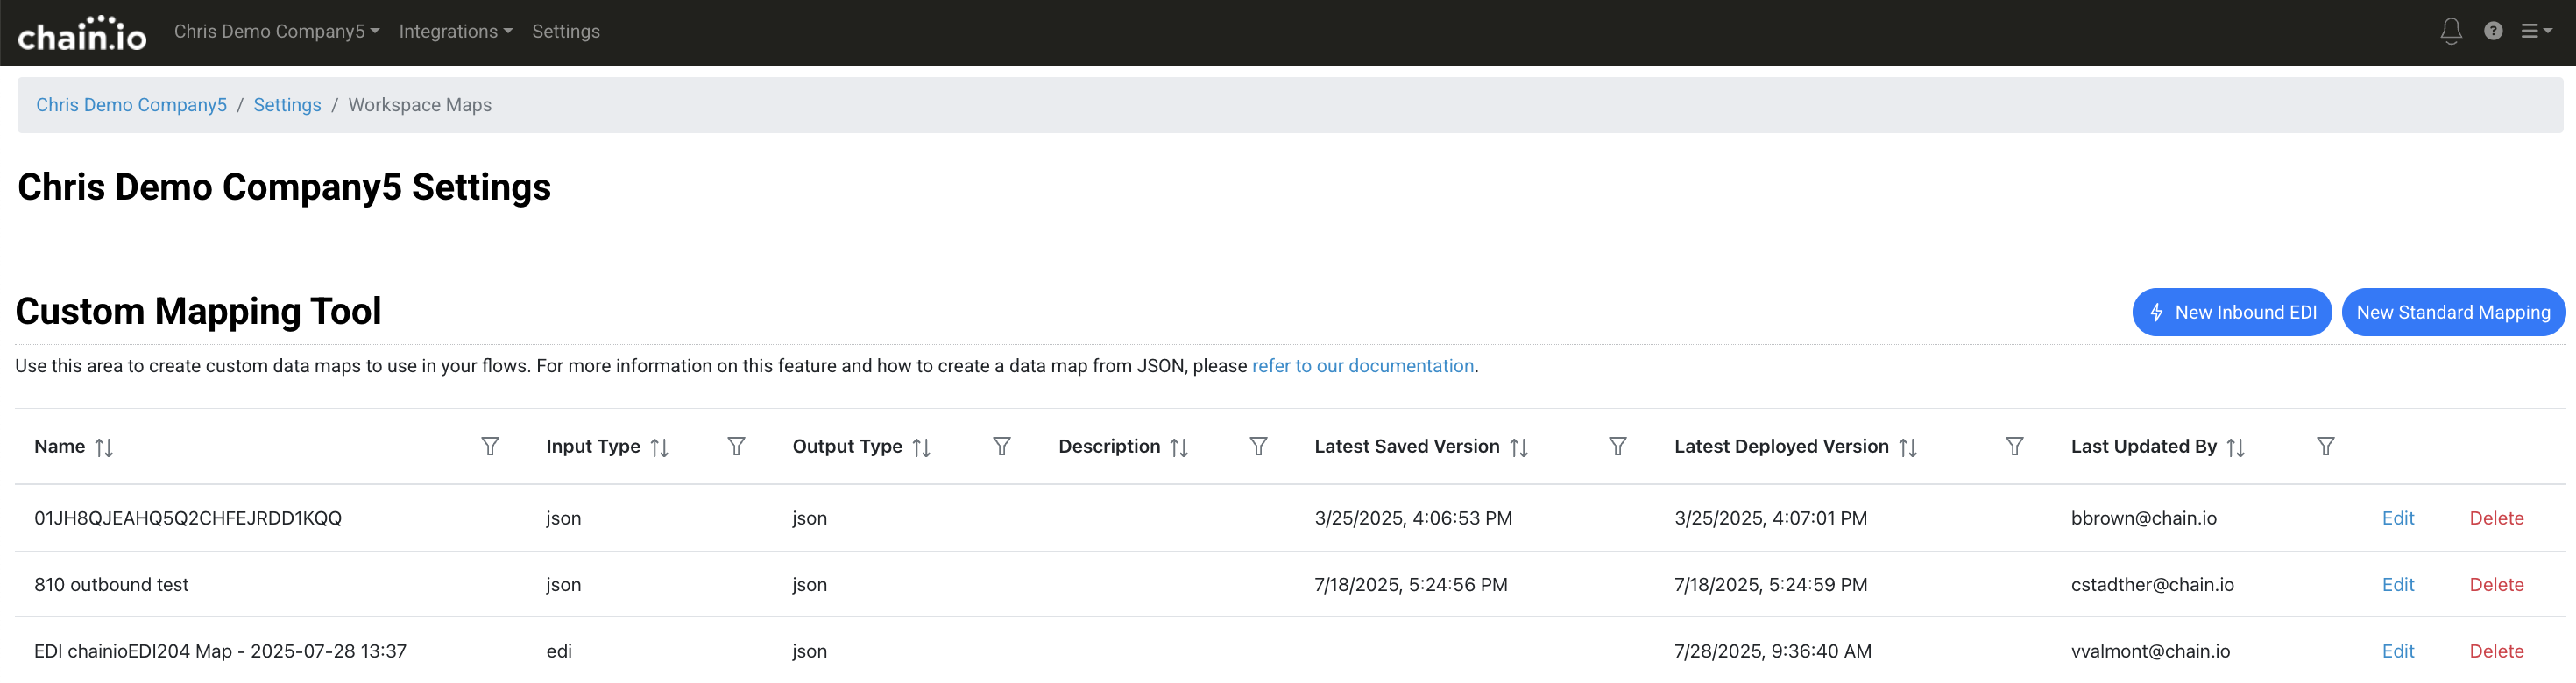
Navigate to Workspace Settings.
Click Custom Mapping Tool.
Click New Inbound EDI.
Select the EDI document type.
Select the Integration.
Select the Flow type.
Upload a specification file. This will be stored in your Integration library.
Upload a sample input file. This will be pre-loaded as the source for your map.
Review the mapping configuration settings.
Click Generate.
Accessing the AI EDI Mapper in the Custom Mapping Tool
The navigation path to access the AI EDI Mapper is the same as the path for accessing the Custom Mapping Tool.
- At the top menu bar, click Workspaces and select the desired Workspace.

- At the top right of the screen, click Workspace Settings from the hamburger menu.
- Navigate to the Developer subsection
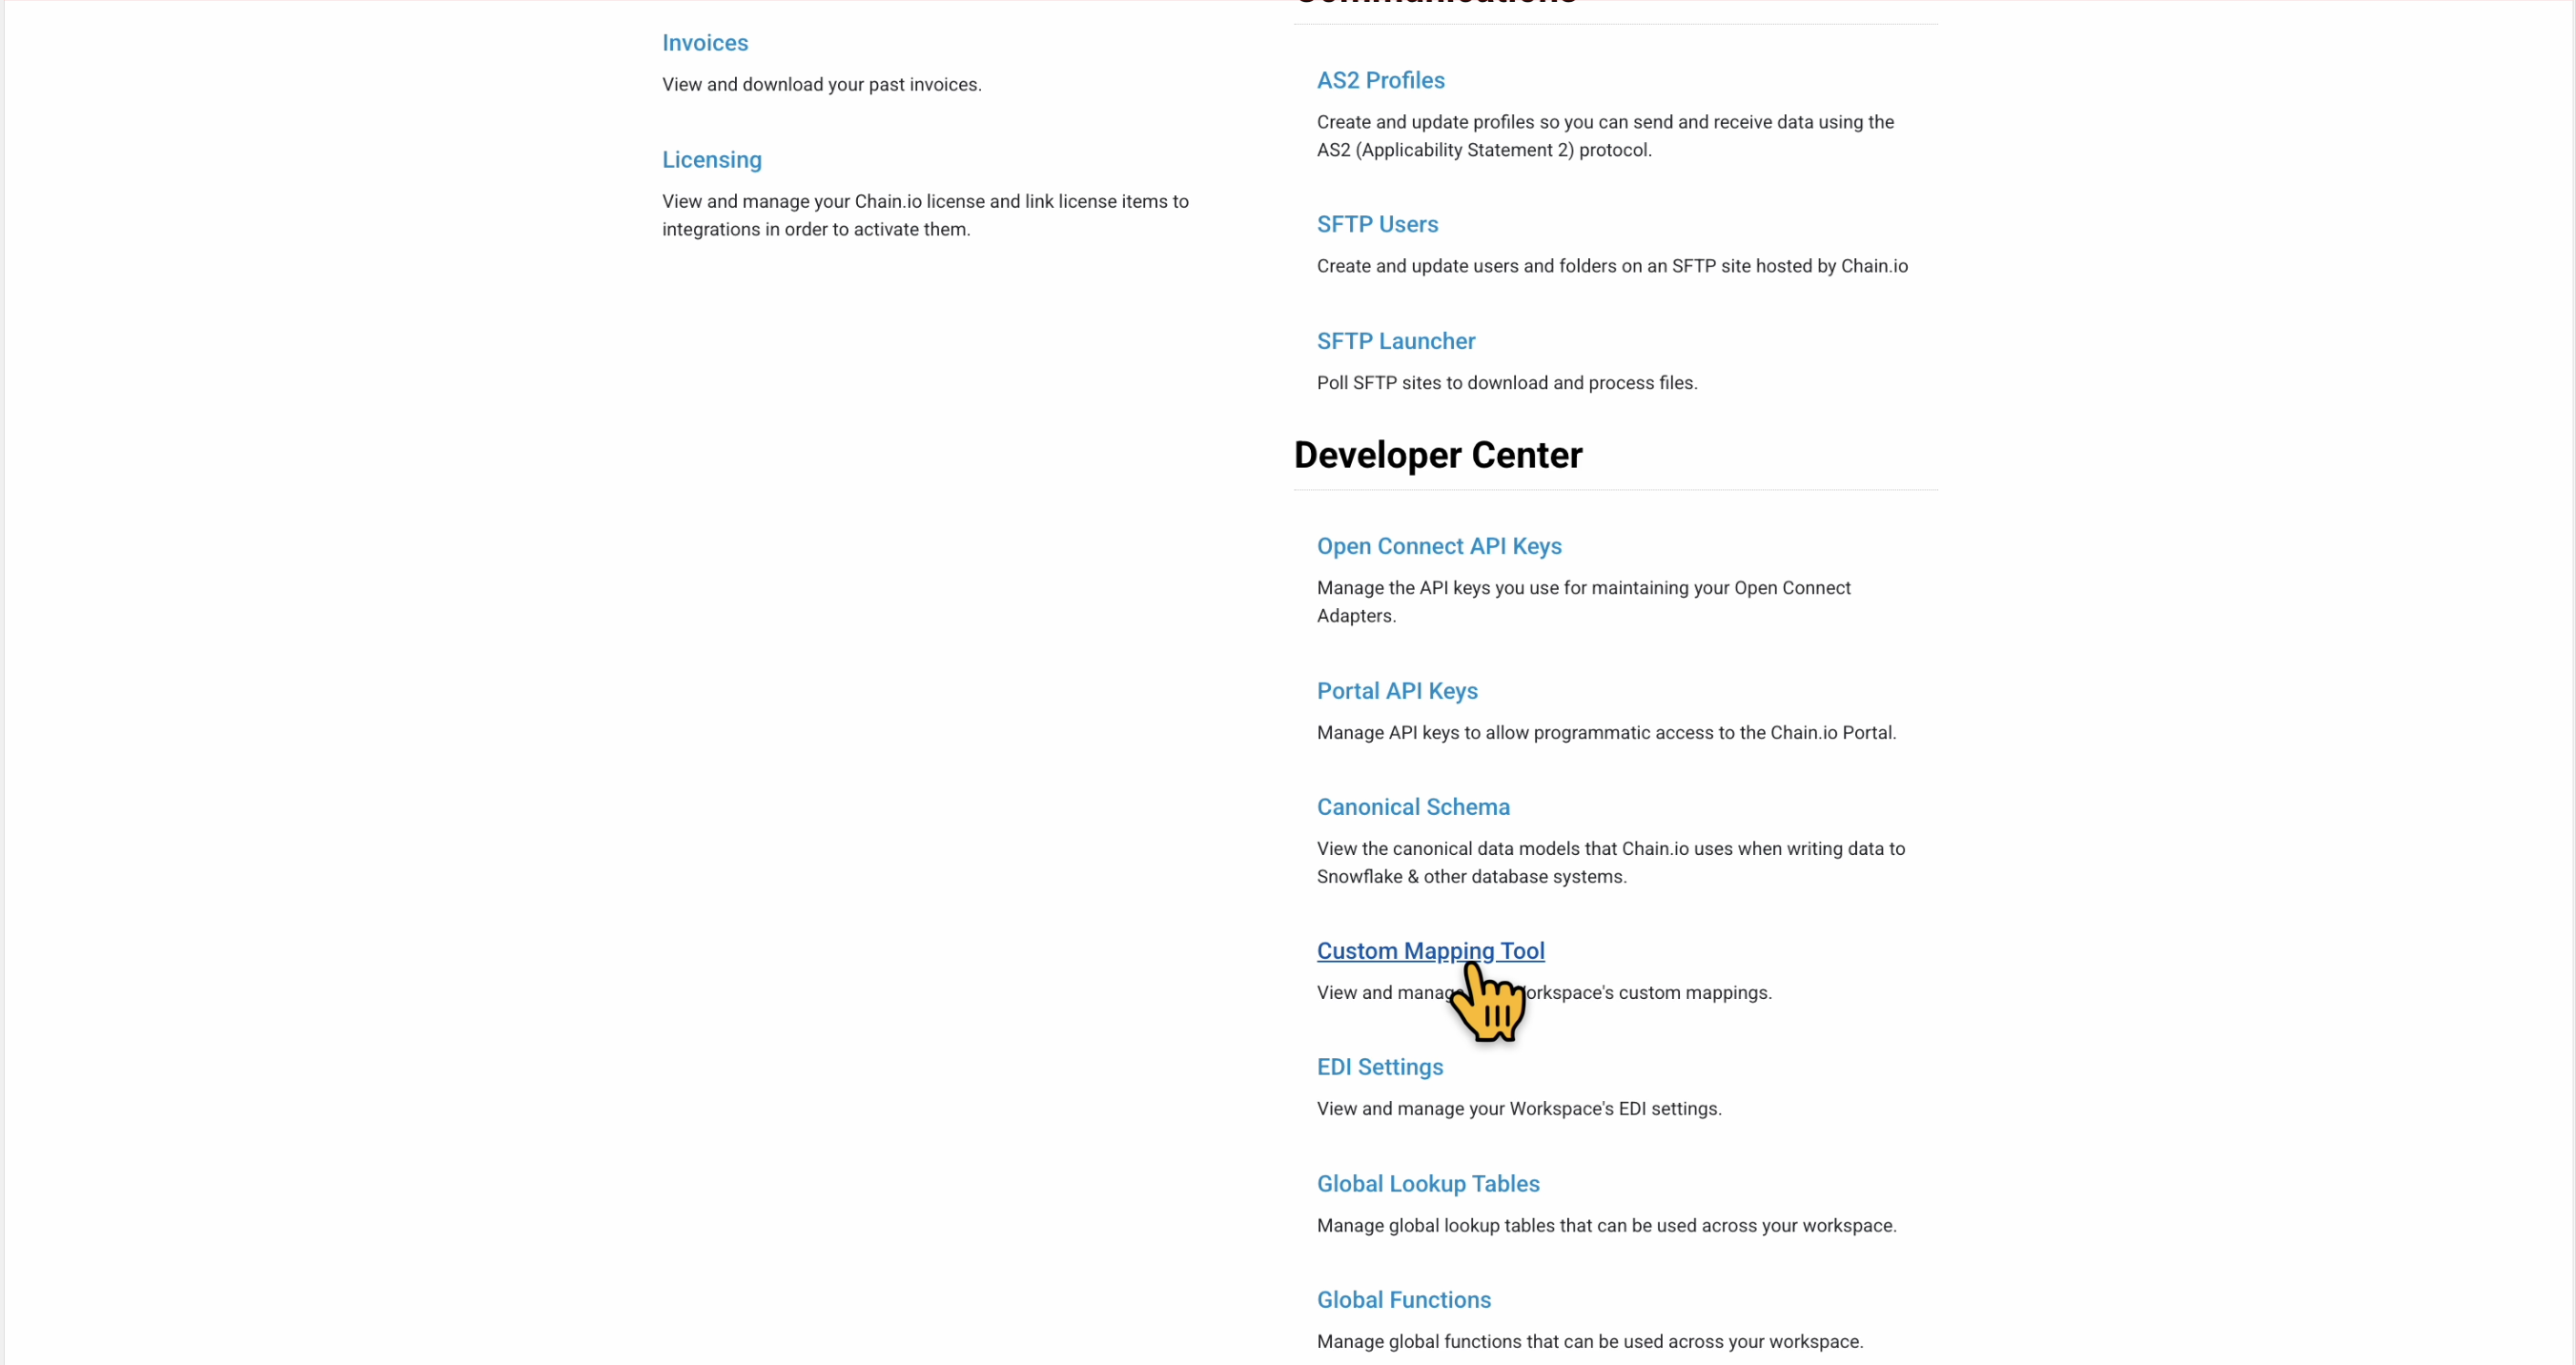
Click Custom Mapping Tool.
The page refreshes to display a list of mappings. If you do not have any mappings, the table will appear blank.
- In the upper right area of the page, click the blue New Inbound EDI button.
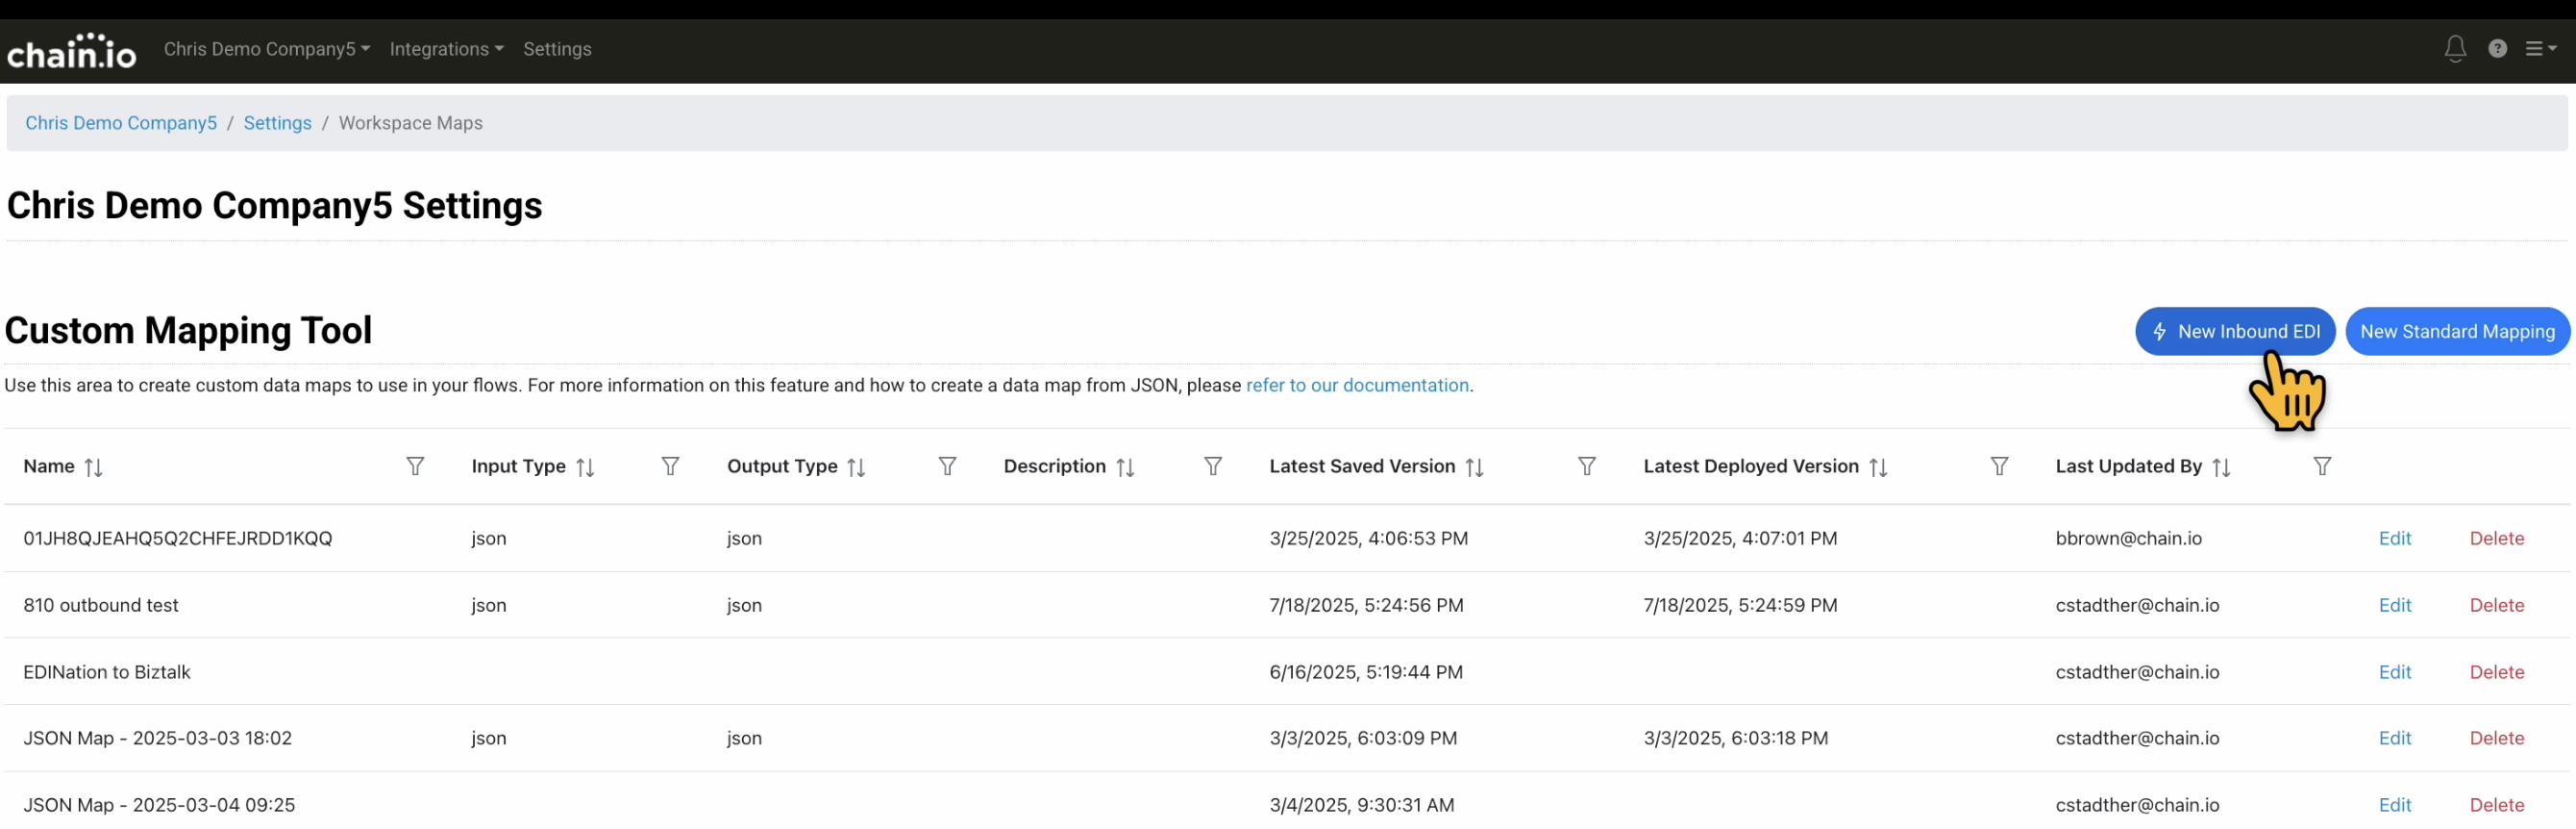
The page refreshes to display the the AI EDI Mapper. The AI EDI Mapper allows you to build EDI maps by uploading a specification document and a sample input file. These two files will be added to your integration library. The sample will also pre-load into your mapping before you customize your JSONata expression.
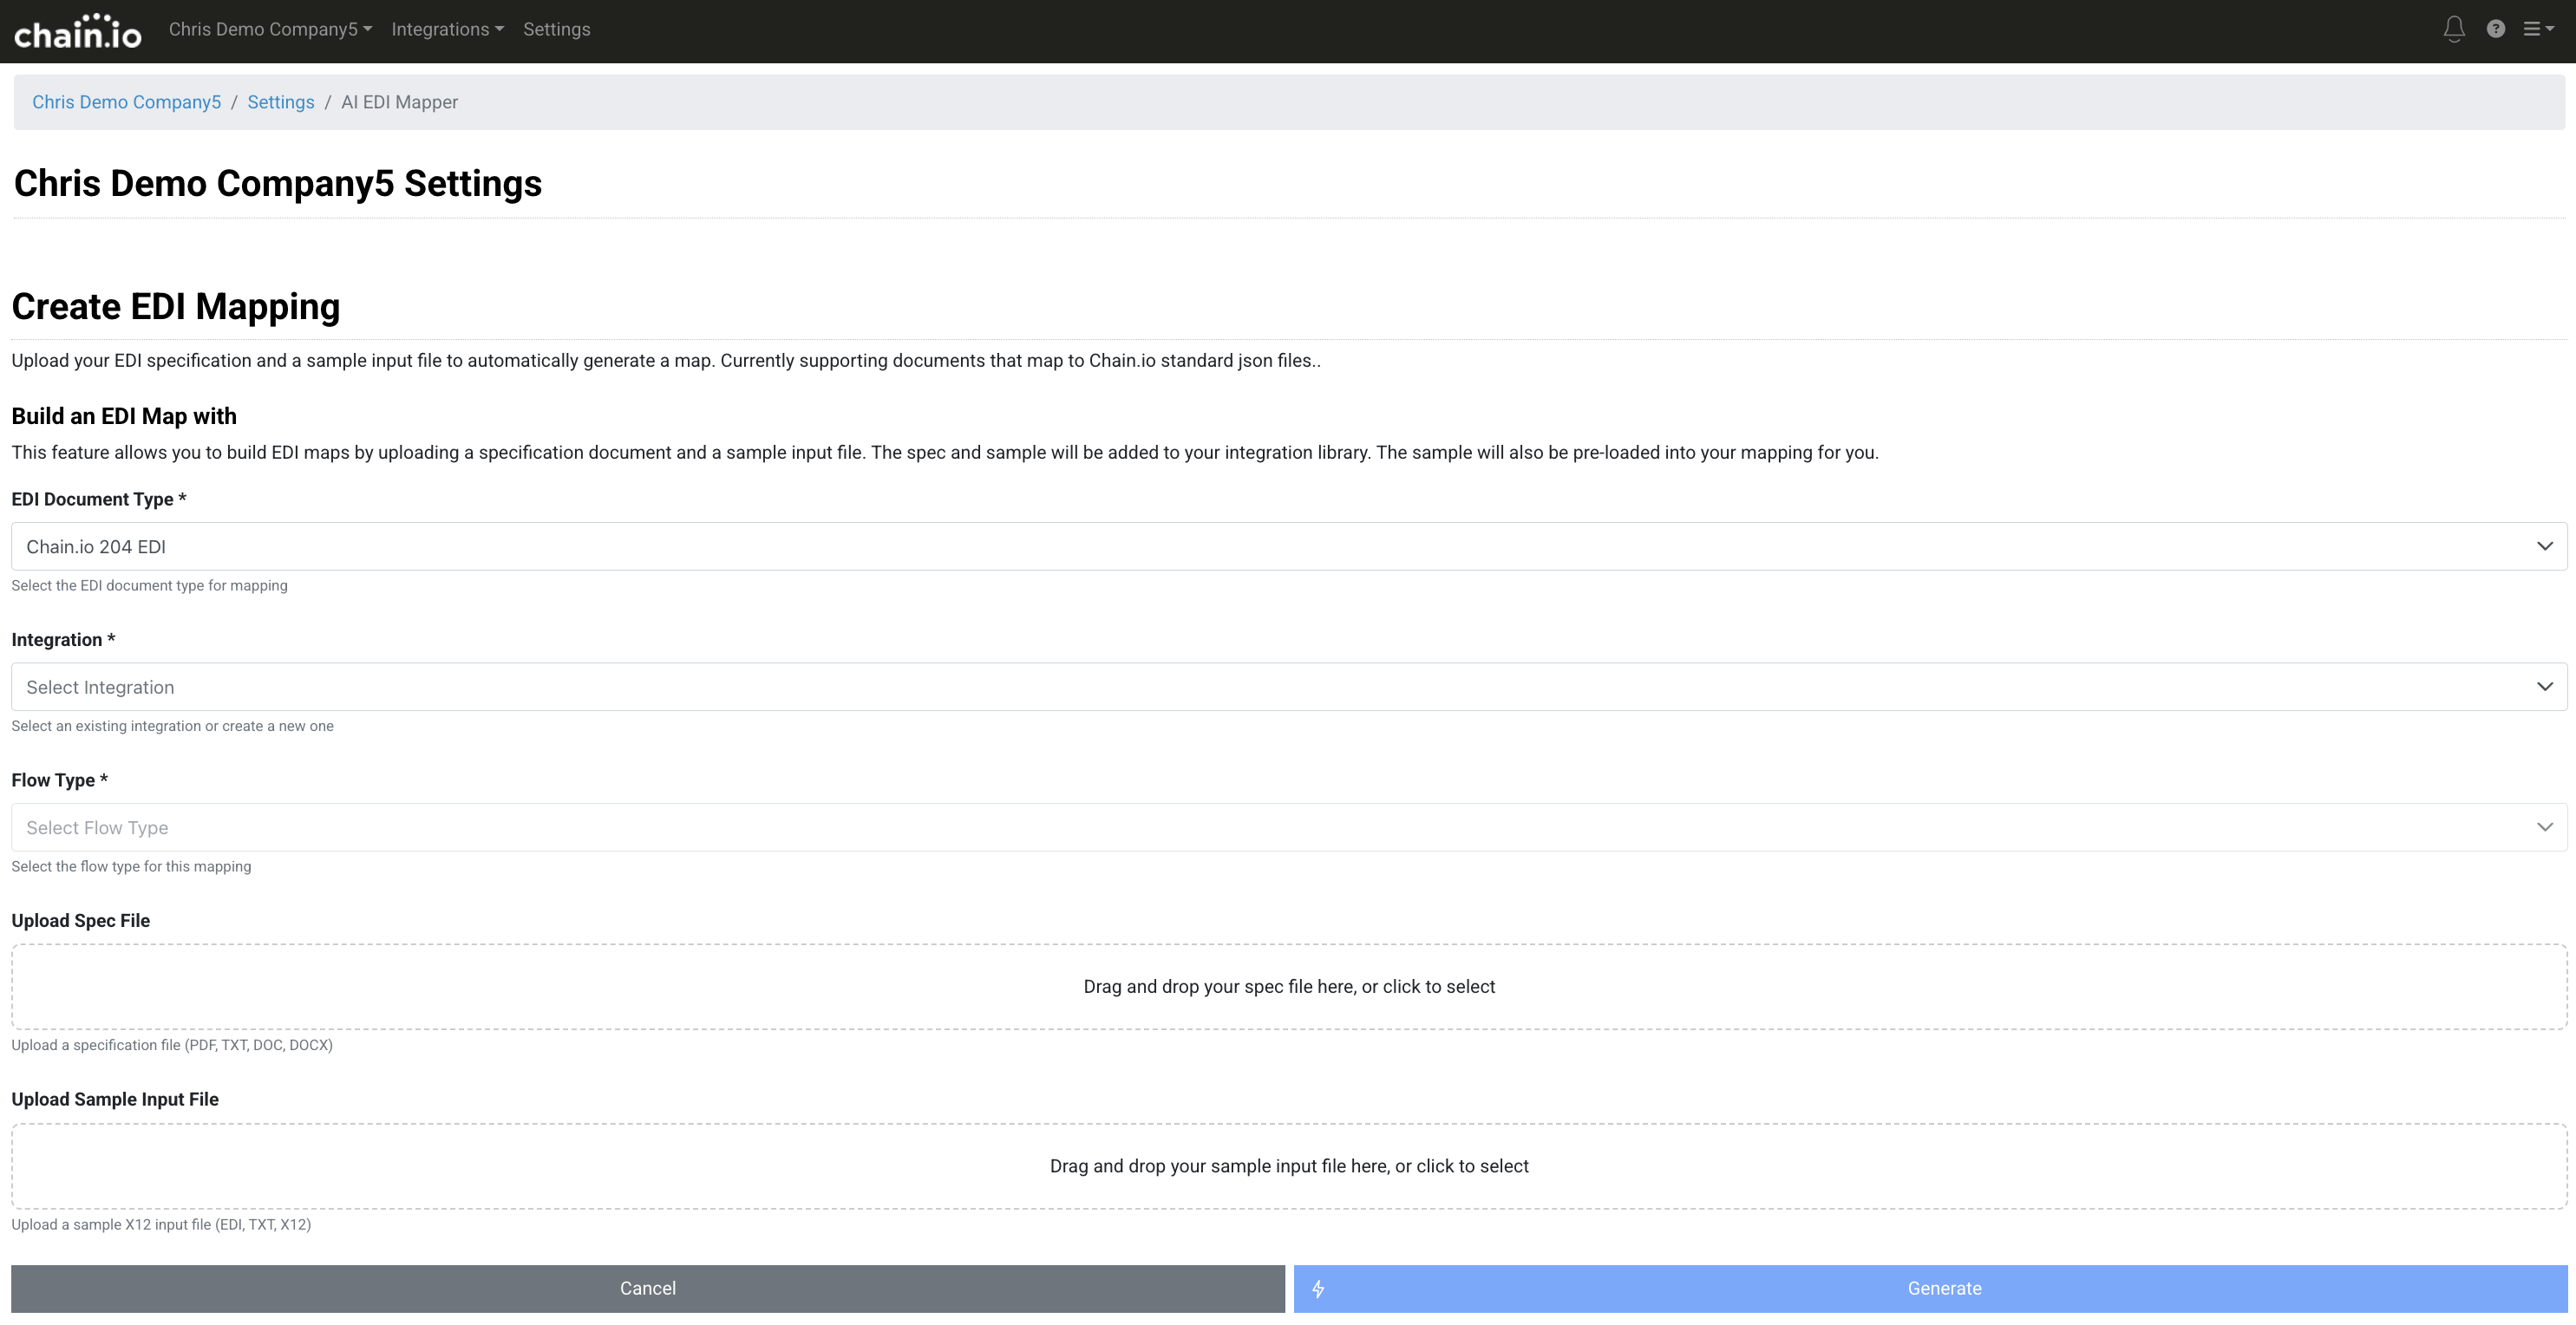
Creating a Mapping with the AI EDI Mapper
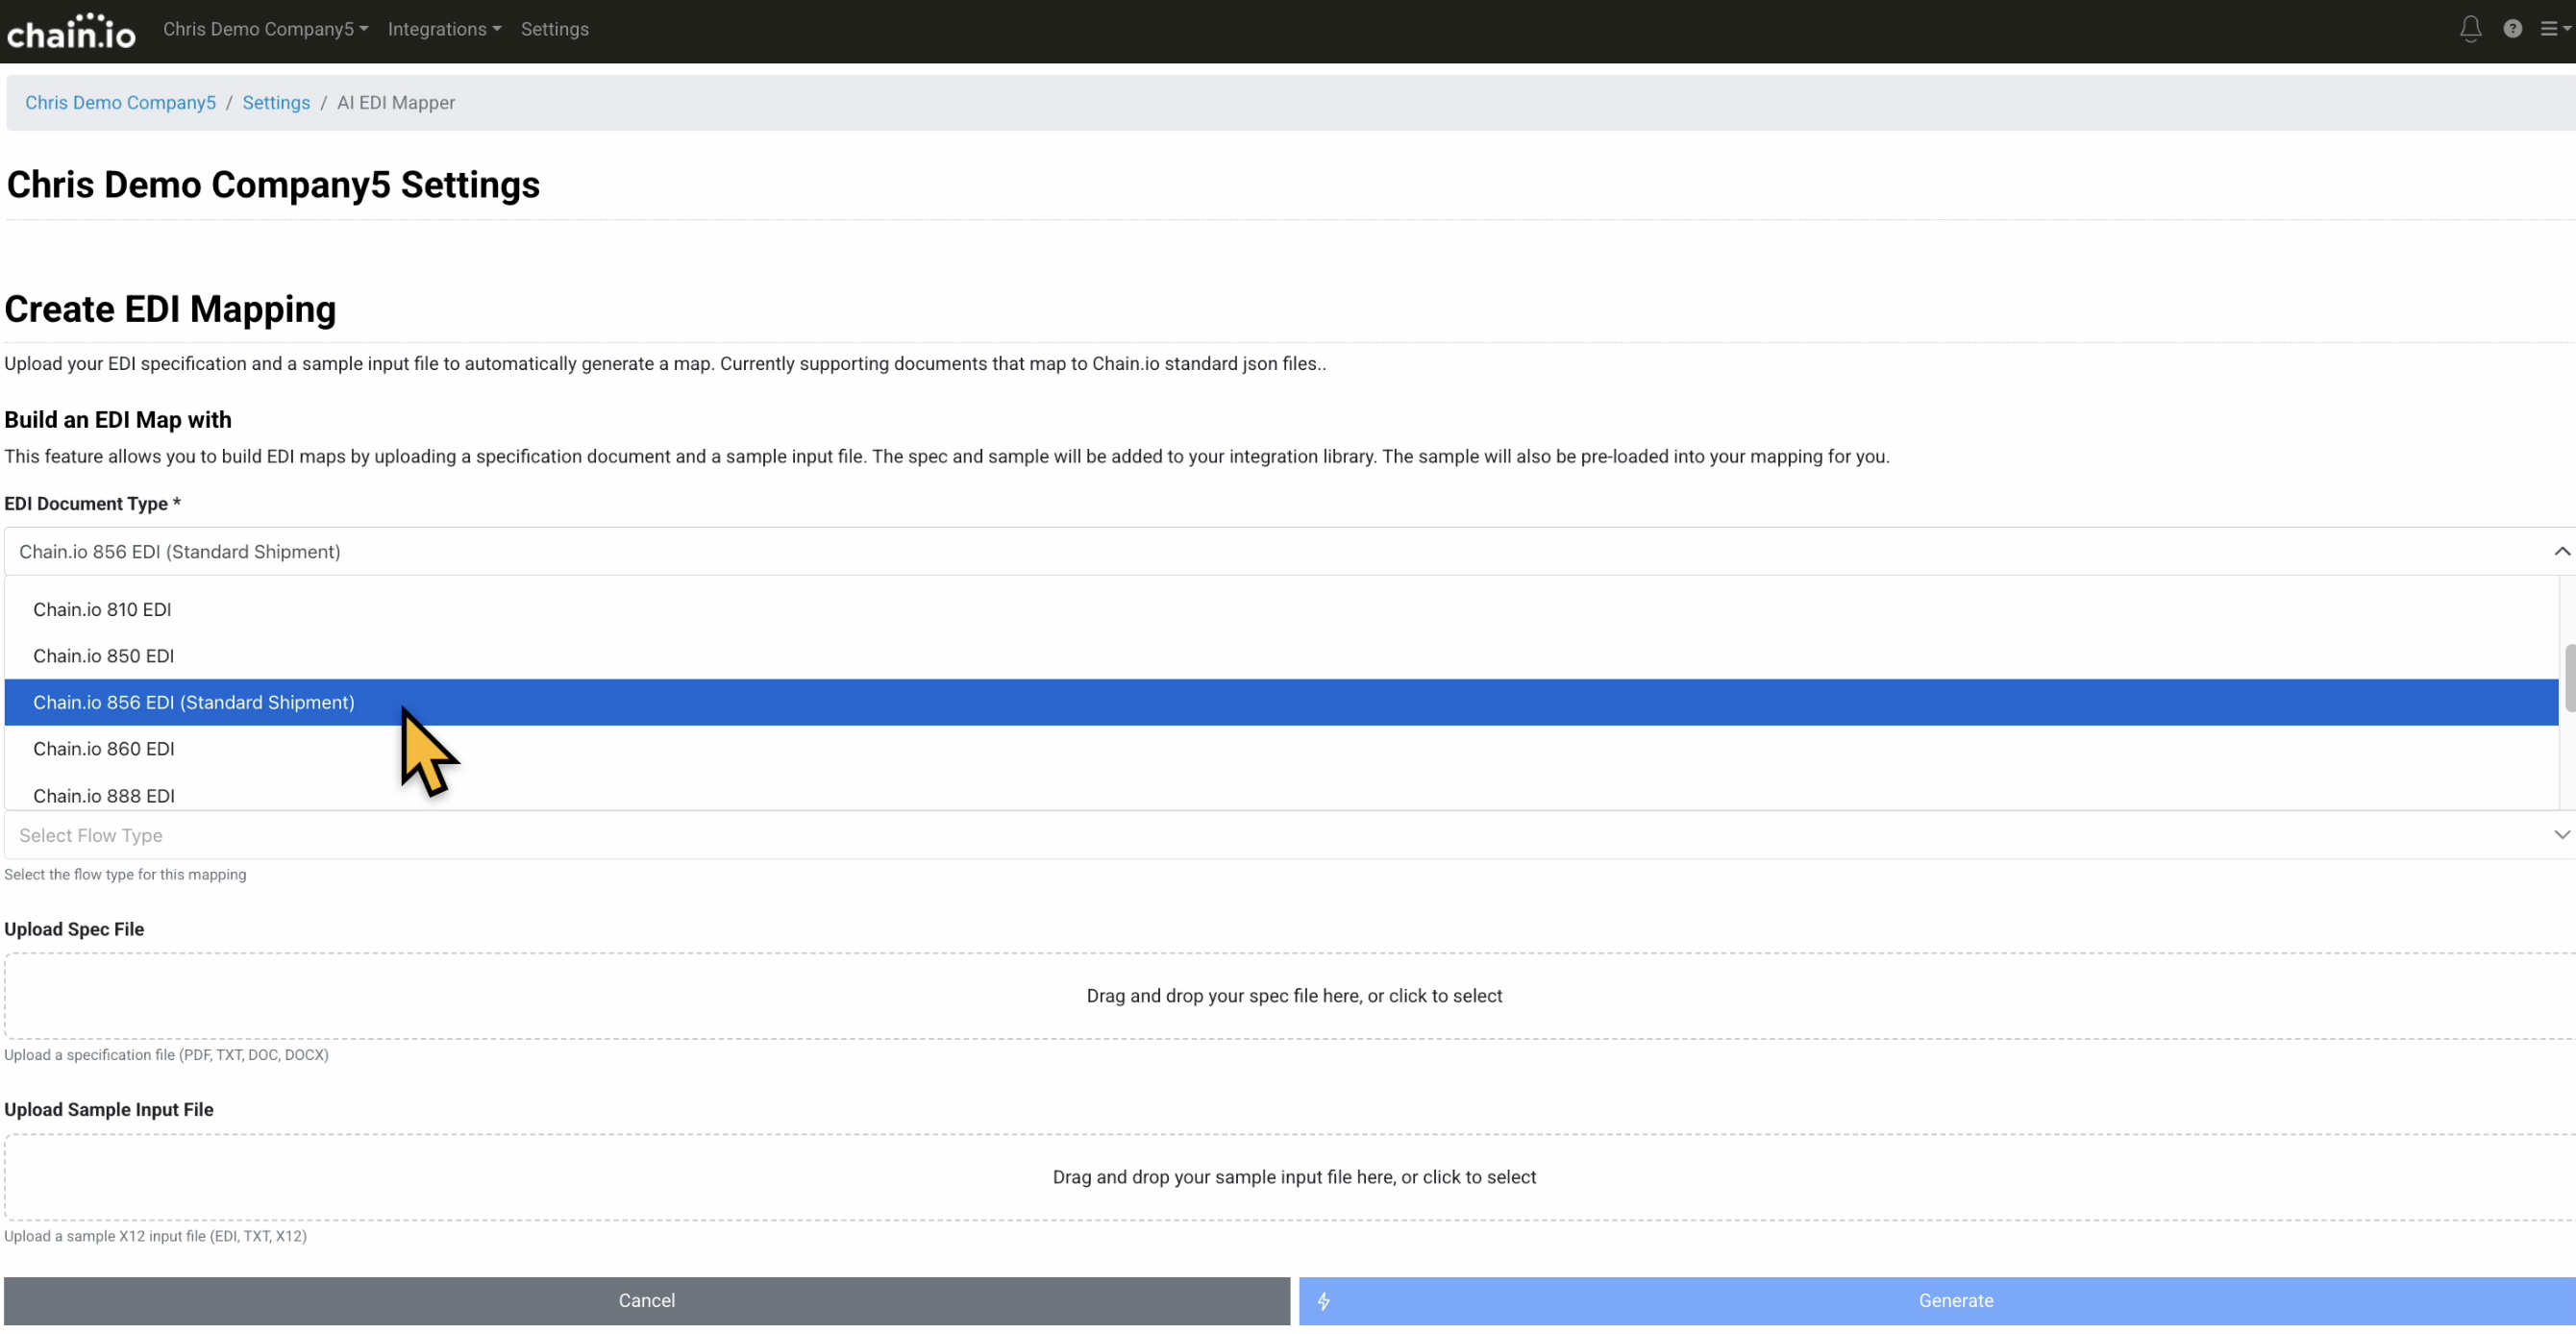
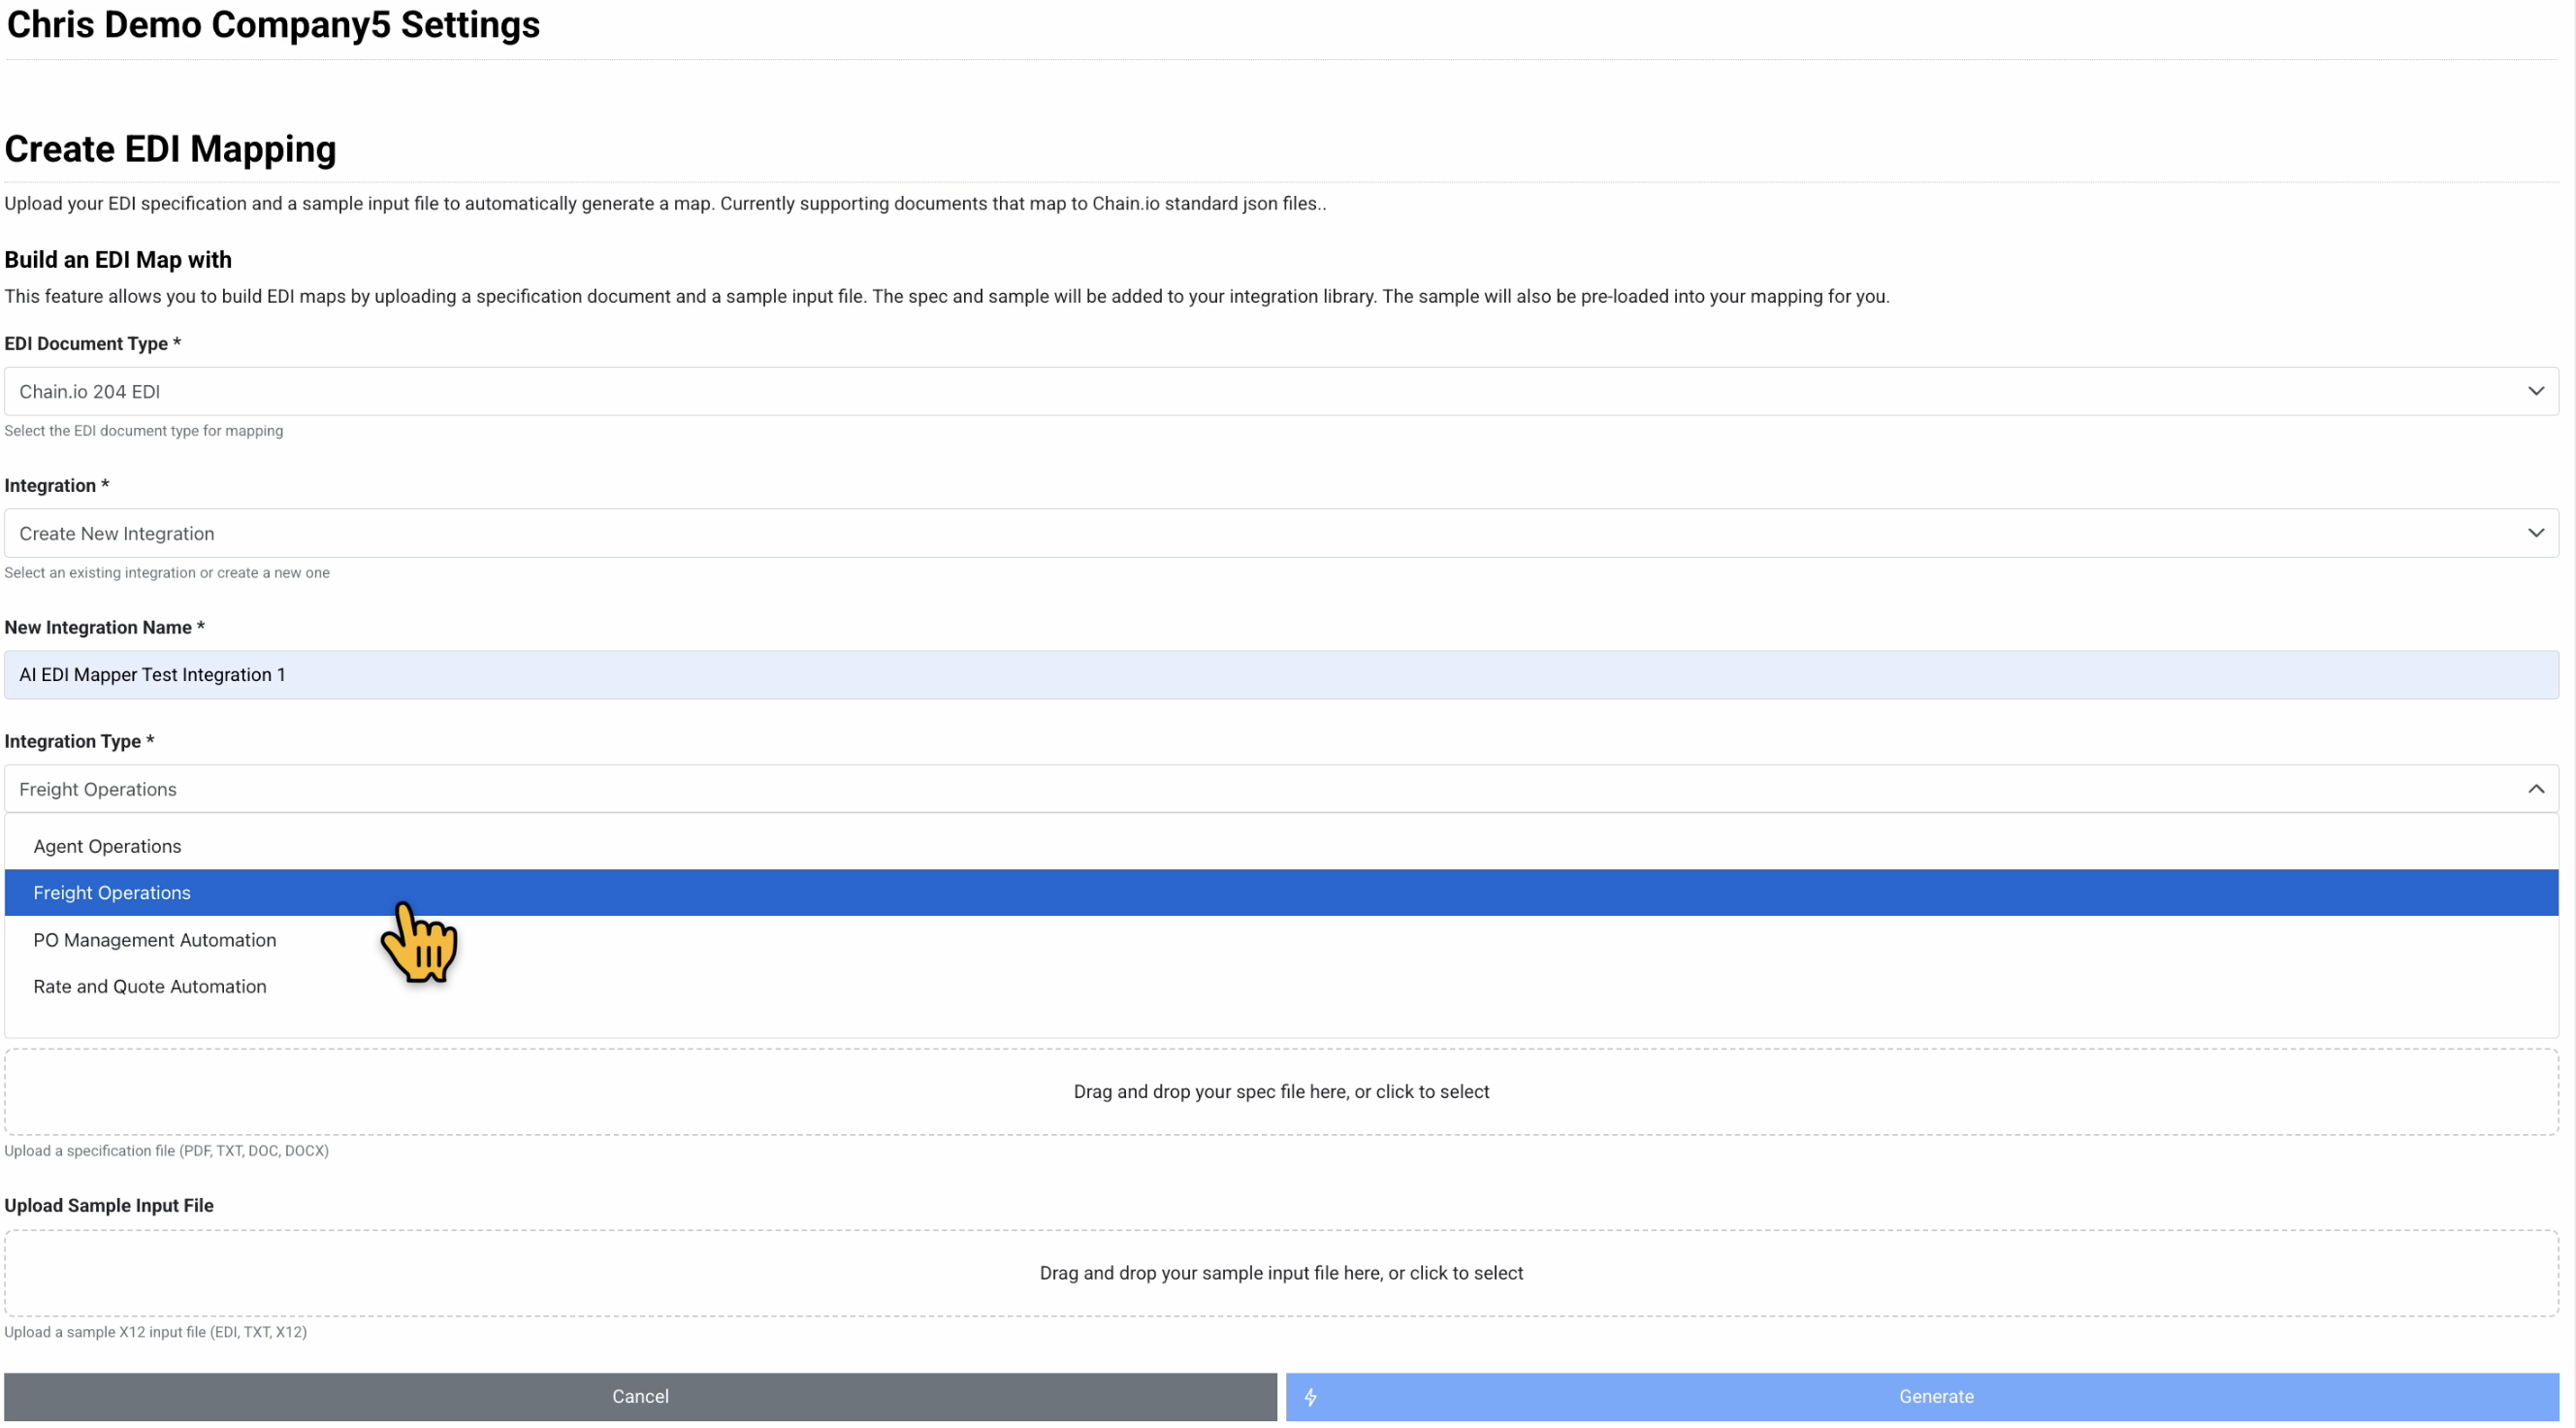
Click the EDI Document Type drop-down menu and select the EDI document type that matches your intended EDI input file.
This selection represents the Chain.io JSON equivalent of the EDI file you are converting.
The options are:
- Chain.io 204 EDI
- Chain.io 300 EDI
- Chain.io 304 EDI
- Chain.io 810 EDI
- Chain.io 850 EDI
- Chain.io 856 EDI (Standard Shipment)
- Chain.io 860 EDI
- Chain.io 888 EDI
- Chain.io 940 EDI
- Chain.io 943 EDI
- Chain.io 945 EDI
- Chain.io 990 EDI
- Chain.io EDIFACT EDI IFTMIN
- Click the Integration drop-down menu and select the Integration type that will be used with the mapping. The list reflects your existing Integrations.
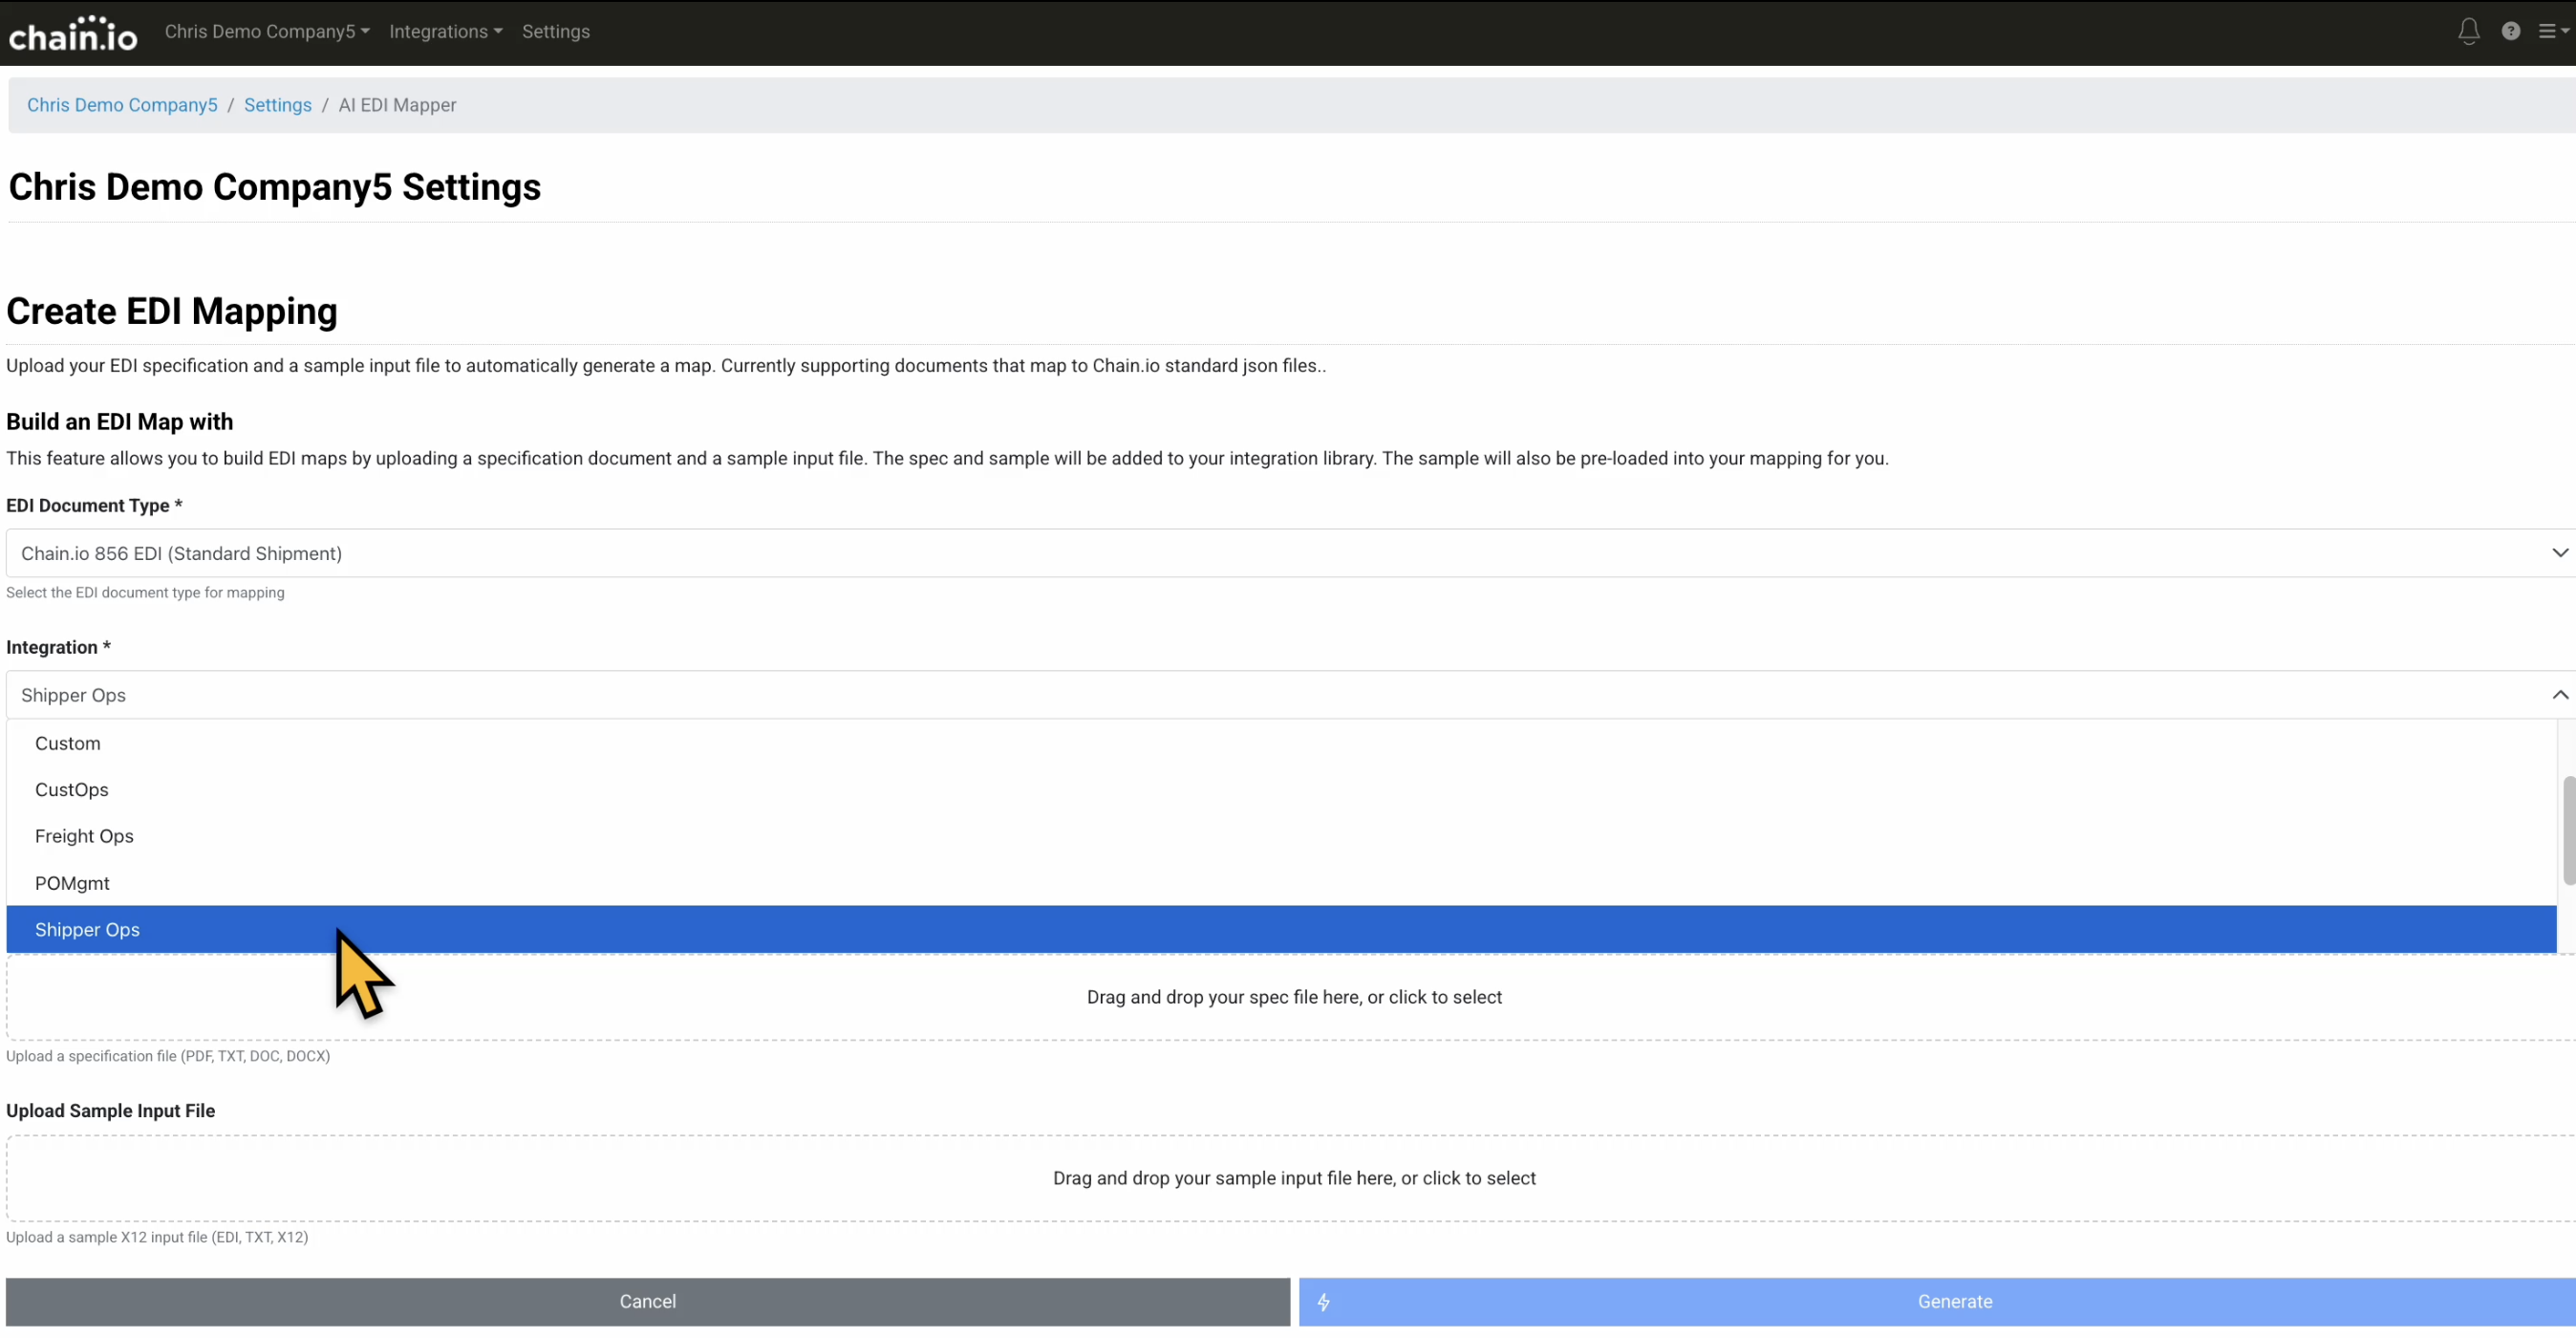
You can also select "Create New Integration" to create a new Integration. The drop-down menu of Integration types is dependent on the EDI document type you selected. If you create a new Integration in the AI EDI Mapper, continue by:
- Entering a new integration name in the New Integration Name field
- Selecting an Integration type from the Integration Type drop-down menu
Example
The remaining instructions for this section will be completed using the option of creating a new Integration for the mapping.
Click the Flow Type drop-down menu and select the Flow that will be used in the mapping.
The list populates based on the Integration type selected in the previous step.
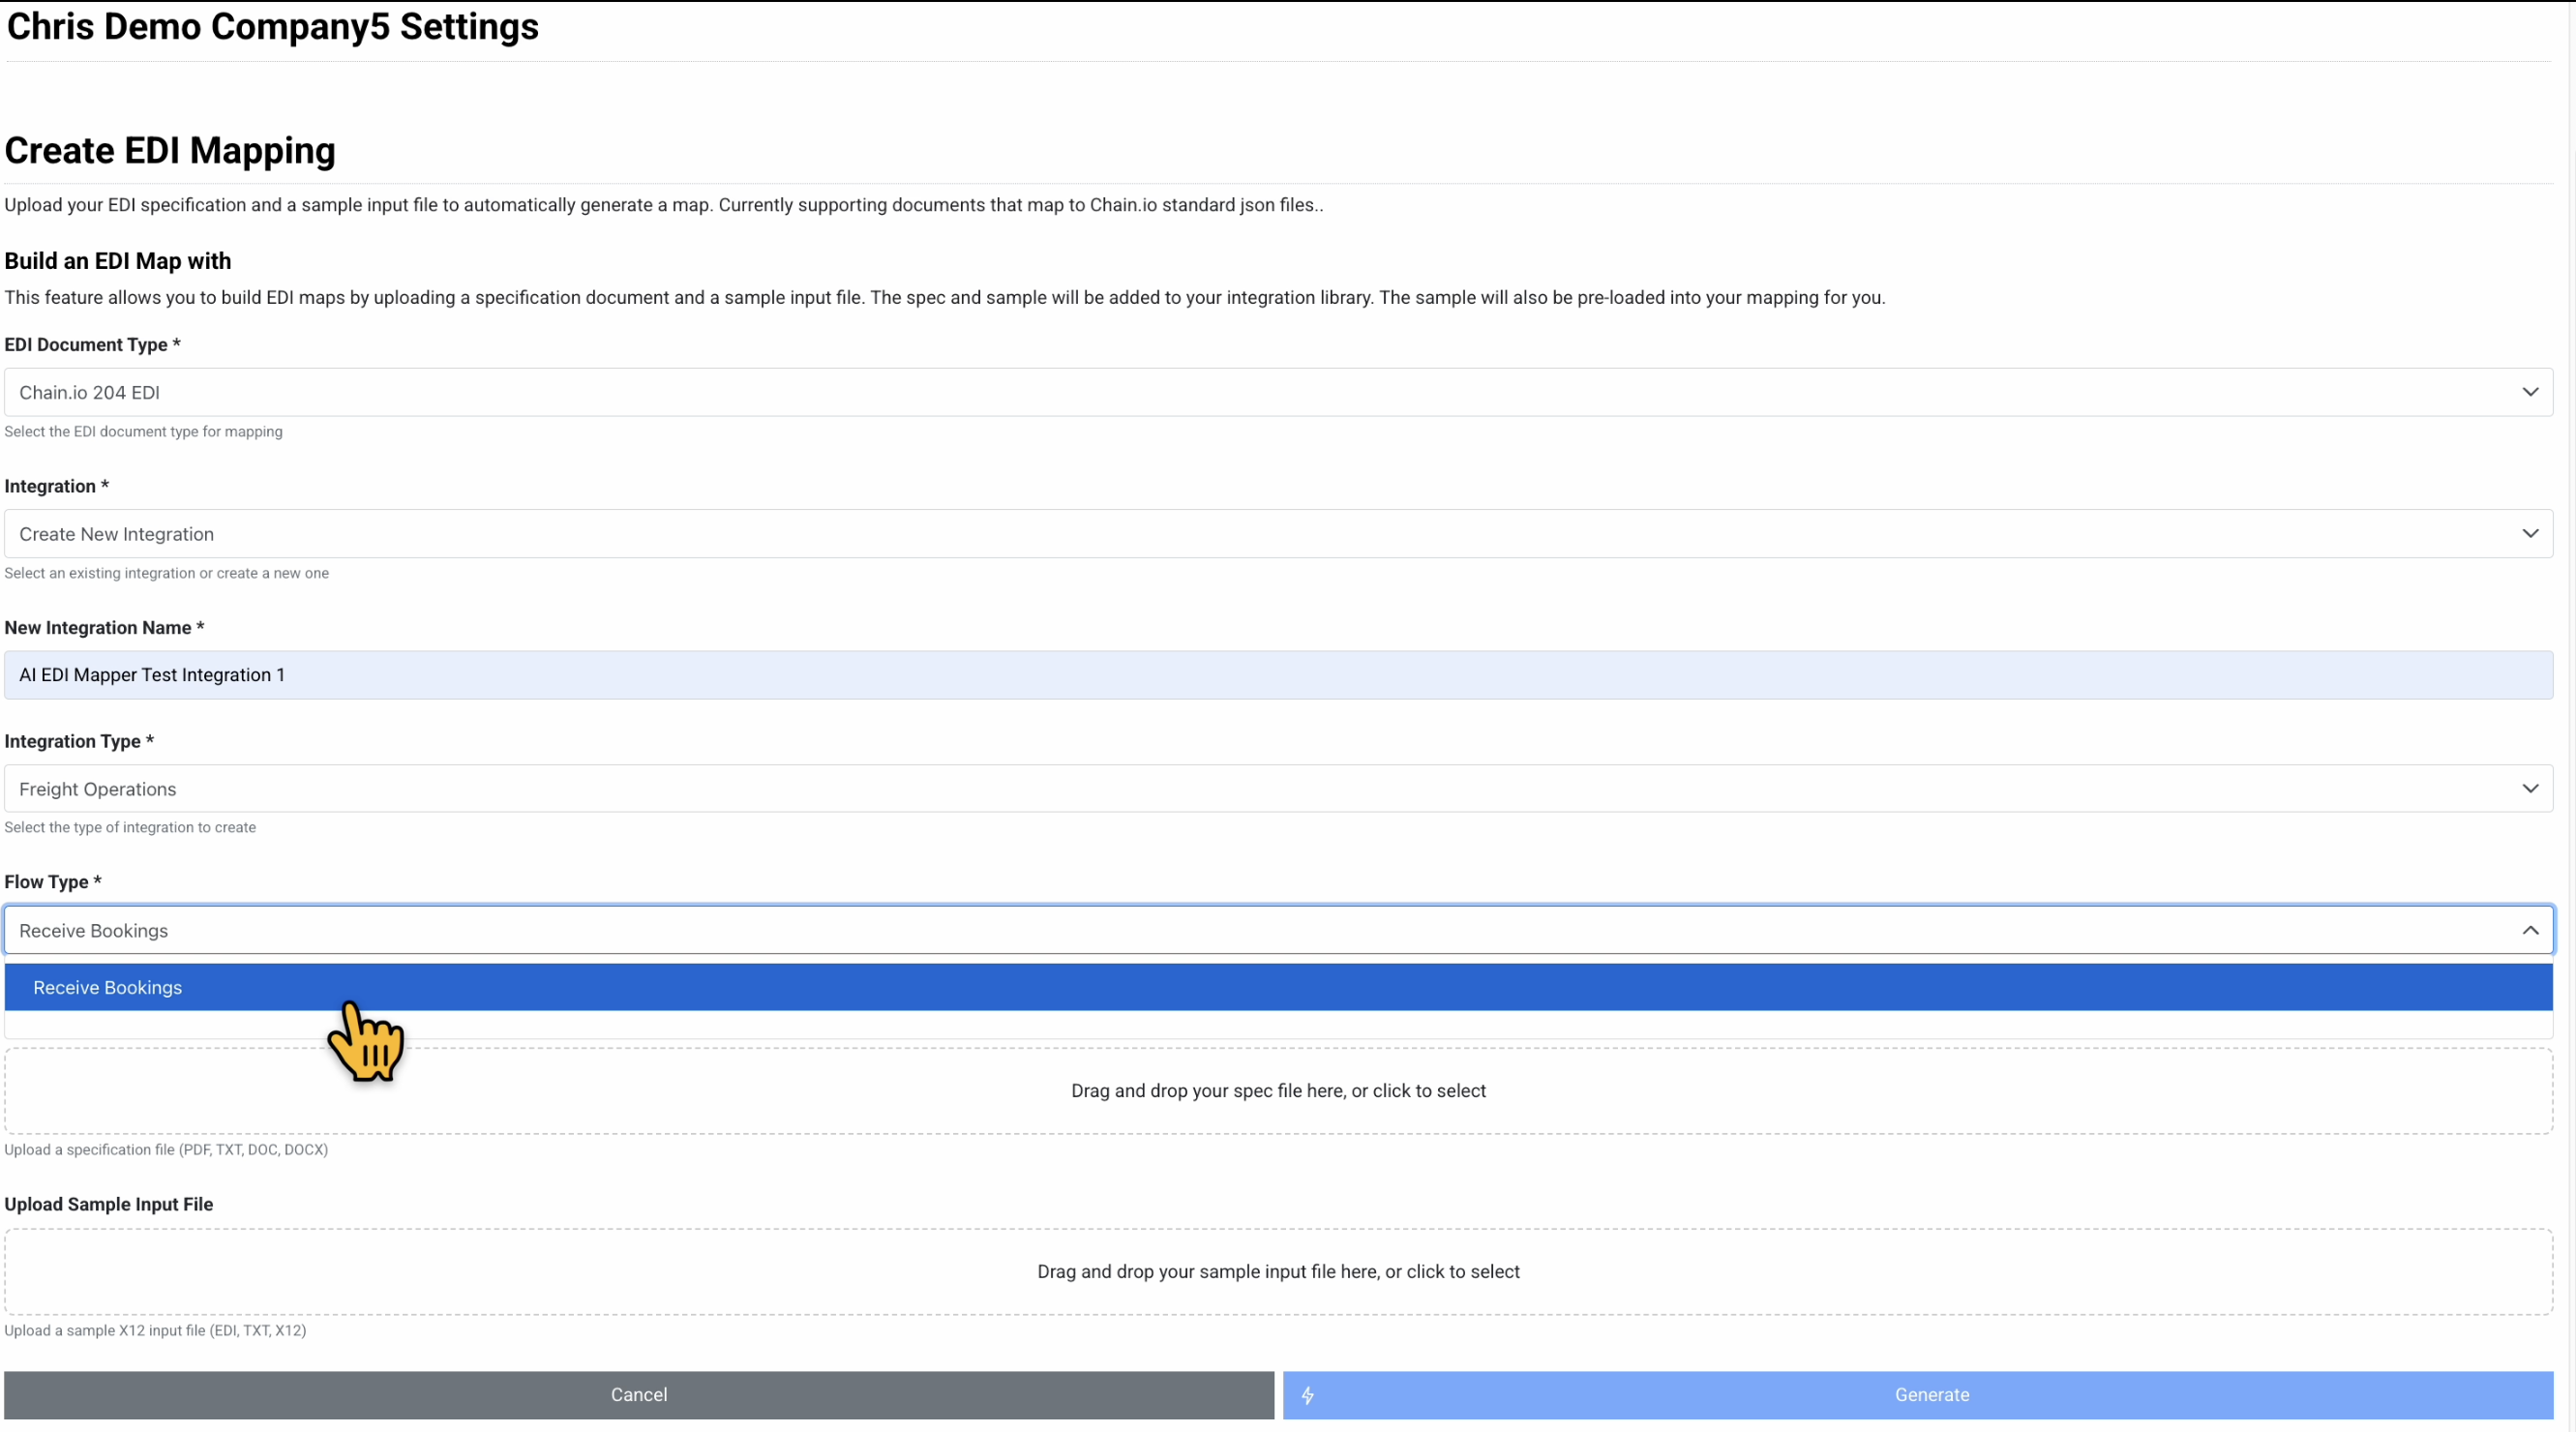
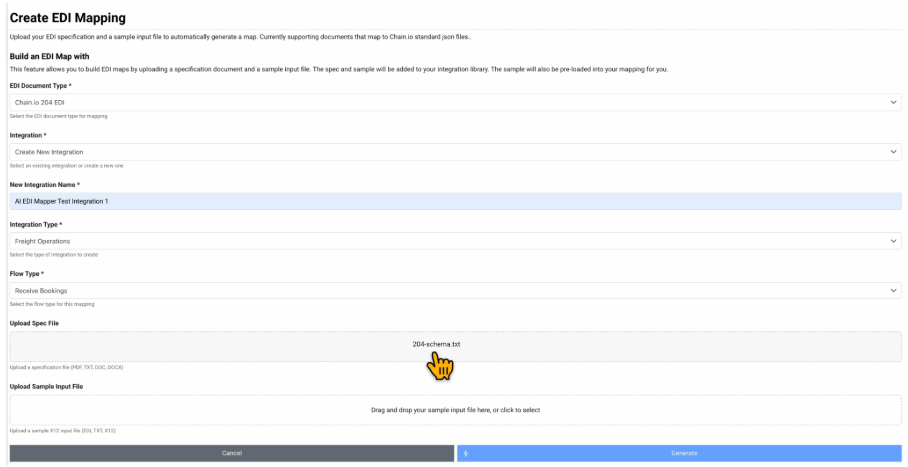
- Click the Upload Spec File region to select a file to upload. You can also drag and drop a file into the region. This will be stored in your Integration library.
EDI Specifications Files and EDI Sample Input Files
Refer to the EDI File Types table below for the specifications file and sample input file corresponding to your EDI document type. Click the specifications file link or sample input file link from the table to download the document. The file will appear in your Downloads folder and you can upload it to the AI EDI Mapper. During the AI EDI Mapper configuration process, you can use your own sample input file or the one provided in the table.
The permissible uploaded file extensions are:
.pdf
.txt
.doc
.docx
.edi
For each EDI file type, the table provides the:
Supported Integration types
List of Integrations that support the EDI file type.Supported Flow types
List of Flows that support the EDI file type.EDI Specifications File
EDI Sample Input File
A gray expandable window to view and or copy the sample file code used in the mapping process
EDI File Types | |||||
|---|---|---|---|---|---|
| EDI File Types | Title | Supported Integration Types | Supported | Specifications File | Sample Input File |
| EDI 204 | Motor Carrier Load Tender |
|
|
|
|
| EDI 300 | Reservations Booking Request (Ocean) |
|
|
|
|
| EDI 301 | Confirmation (Ocean) |
|
|
|
|
|
| ||||
| EDI 304 | Shipping Instructions (Ocean) |
|
|
|
|
| EDI 315 | Status Details (Ocean) |
|
|
|
|
|
| ||||
| EDI 810 | Invoice |
|
|
|
|
| EDI 850 | Purchase Order |
|
| ||
| EDI 856 | Advance Shipping Notice (ASN) |
|
|
|
|
|
| ||||
|
| ||||
| EDI 860 | Purchase Order Change Request - Buyer Initiated |
|
|
|
|
| EDI 888 | Item Maintenance |
|
|
|
|
| EDI 940 | Warehouse Shipping Order |
|
| EDI 940 Specifications File | EDI 940 Sample File |
| EDI 943 | Warehouse Stock Transfer Shipment Advice |
|
|
|
|
| EDI 945 | Warehouse Shipping Advice |
|
| EDI 945 Specifications File | EDI 945 Sample File |
| EDI 990 | Response to a Load Tender |
|
|
|
|
|
| ||||
|
| ||||
|
| ||||
| EDI IFTMIN | EDIFACT Instruction Message |
|
| EDI IFTMIN Specifications File | EDI IFTMIN Sample File |
|
| ||||
- Click the Upload Sample Input File region to select a file to upload. You can also drag and drop a file into the region. This will be pre-loaded as the source for your mapping.
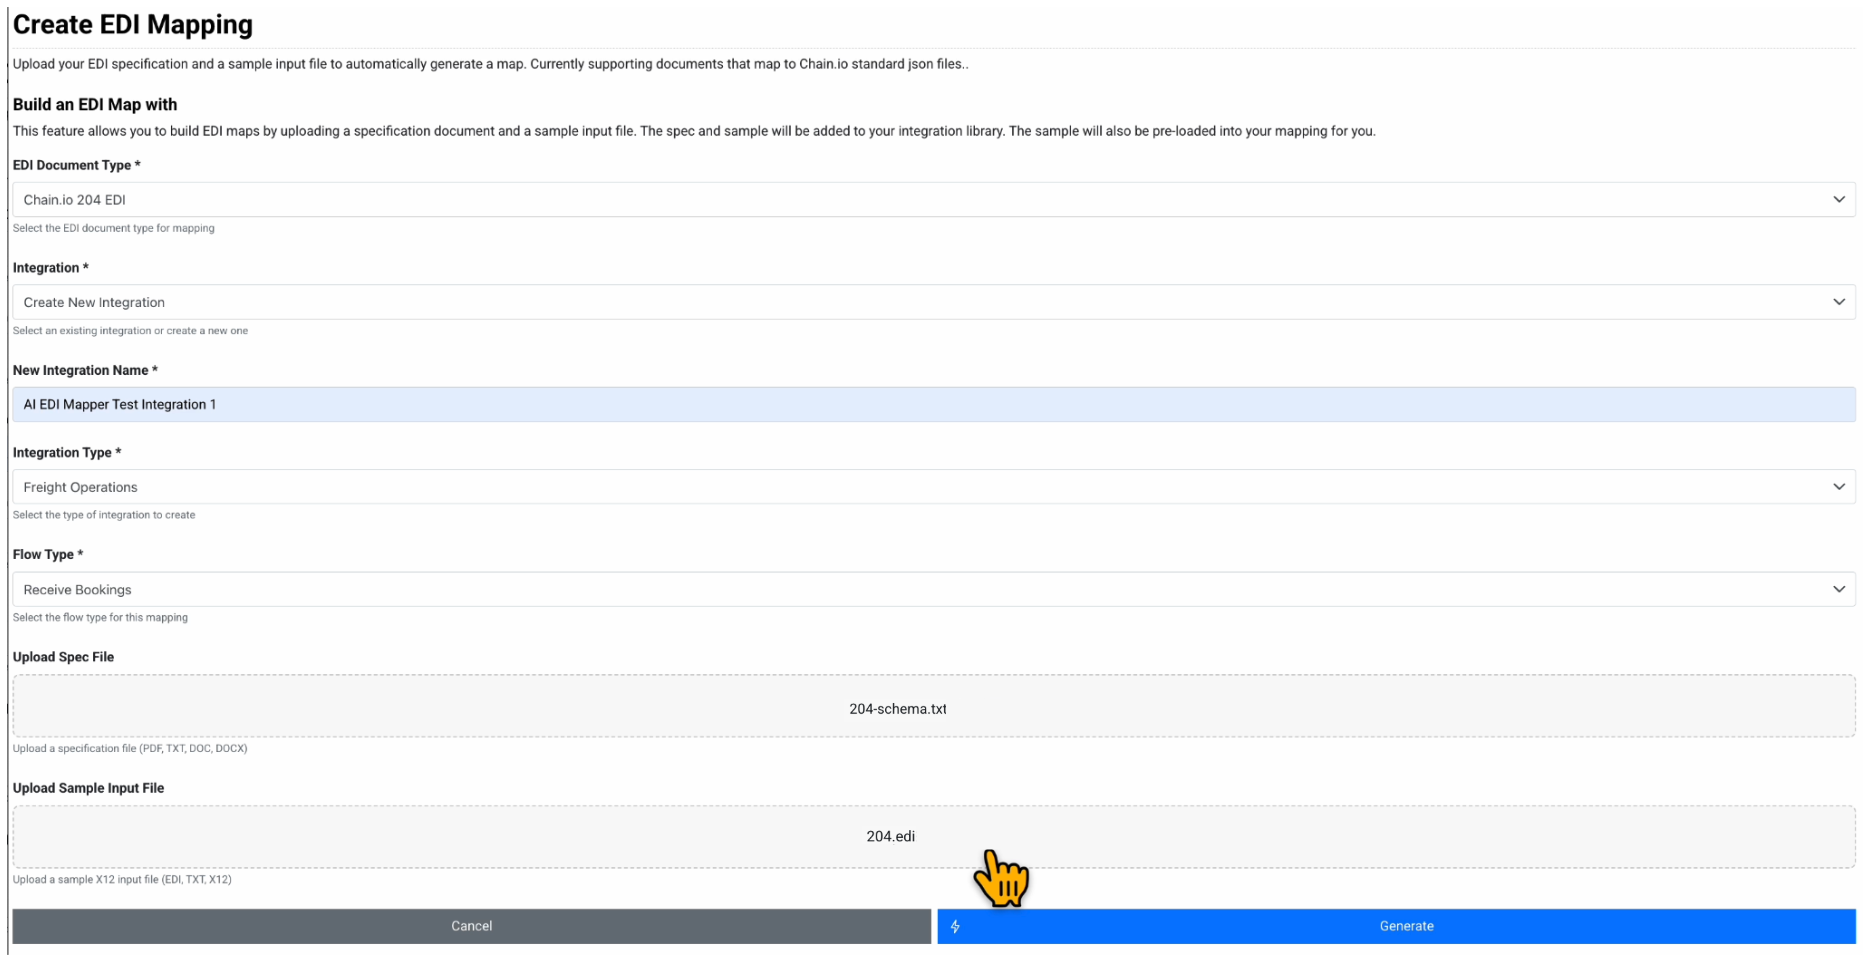
Review the AI EDI Mapper form to ensure all required fields are completed.
At the bottom of the page, click the blue Generate button to create the EDI mapping.
Review the selections on the Confirm EDI Map Generation pop-up window.
The system pre-selects the following actions to take place from the mapping generation. These two actions can be unselected if desired.Upload the specification and sample files to Integration library.
Create a Flow using the generated map.
The system always performs the following actions when using the AI EDI Mapper:Create an EDI mapping for the specified EDI document type.
Create the EDI mapping in the selected Integration.
Click the blue Generate button to confirm the EDI mapping configuration settings.

The page refreshes to confirm that the EDI mapping was generated successfully. If fields were missing from the EDI Mapper Generation form, the system will prompt you to update them before generating a successful mapping.
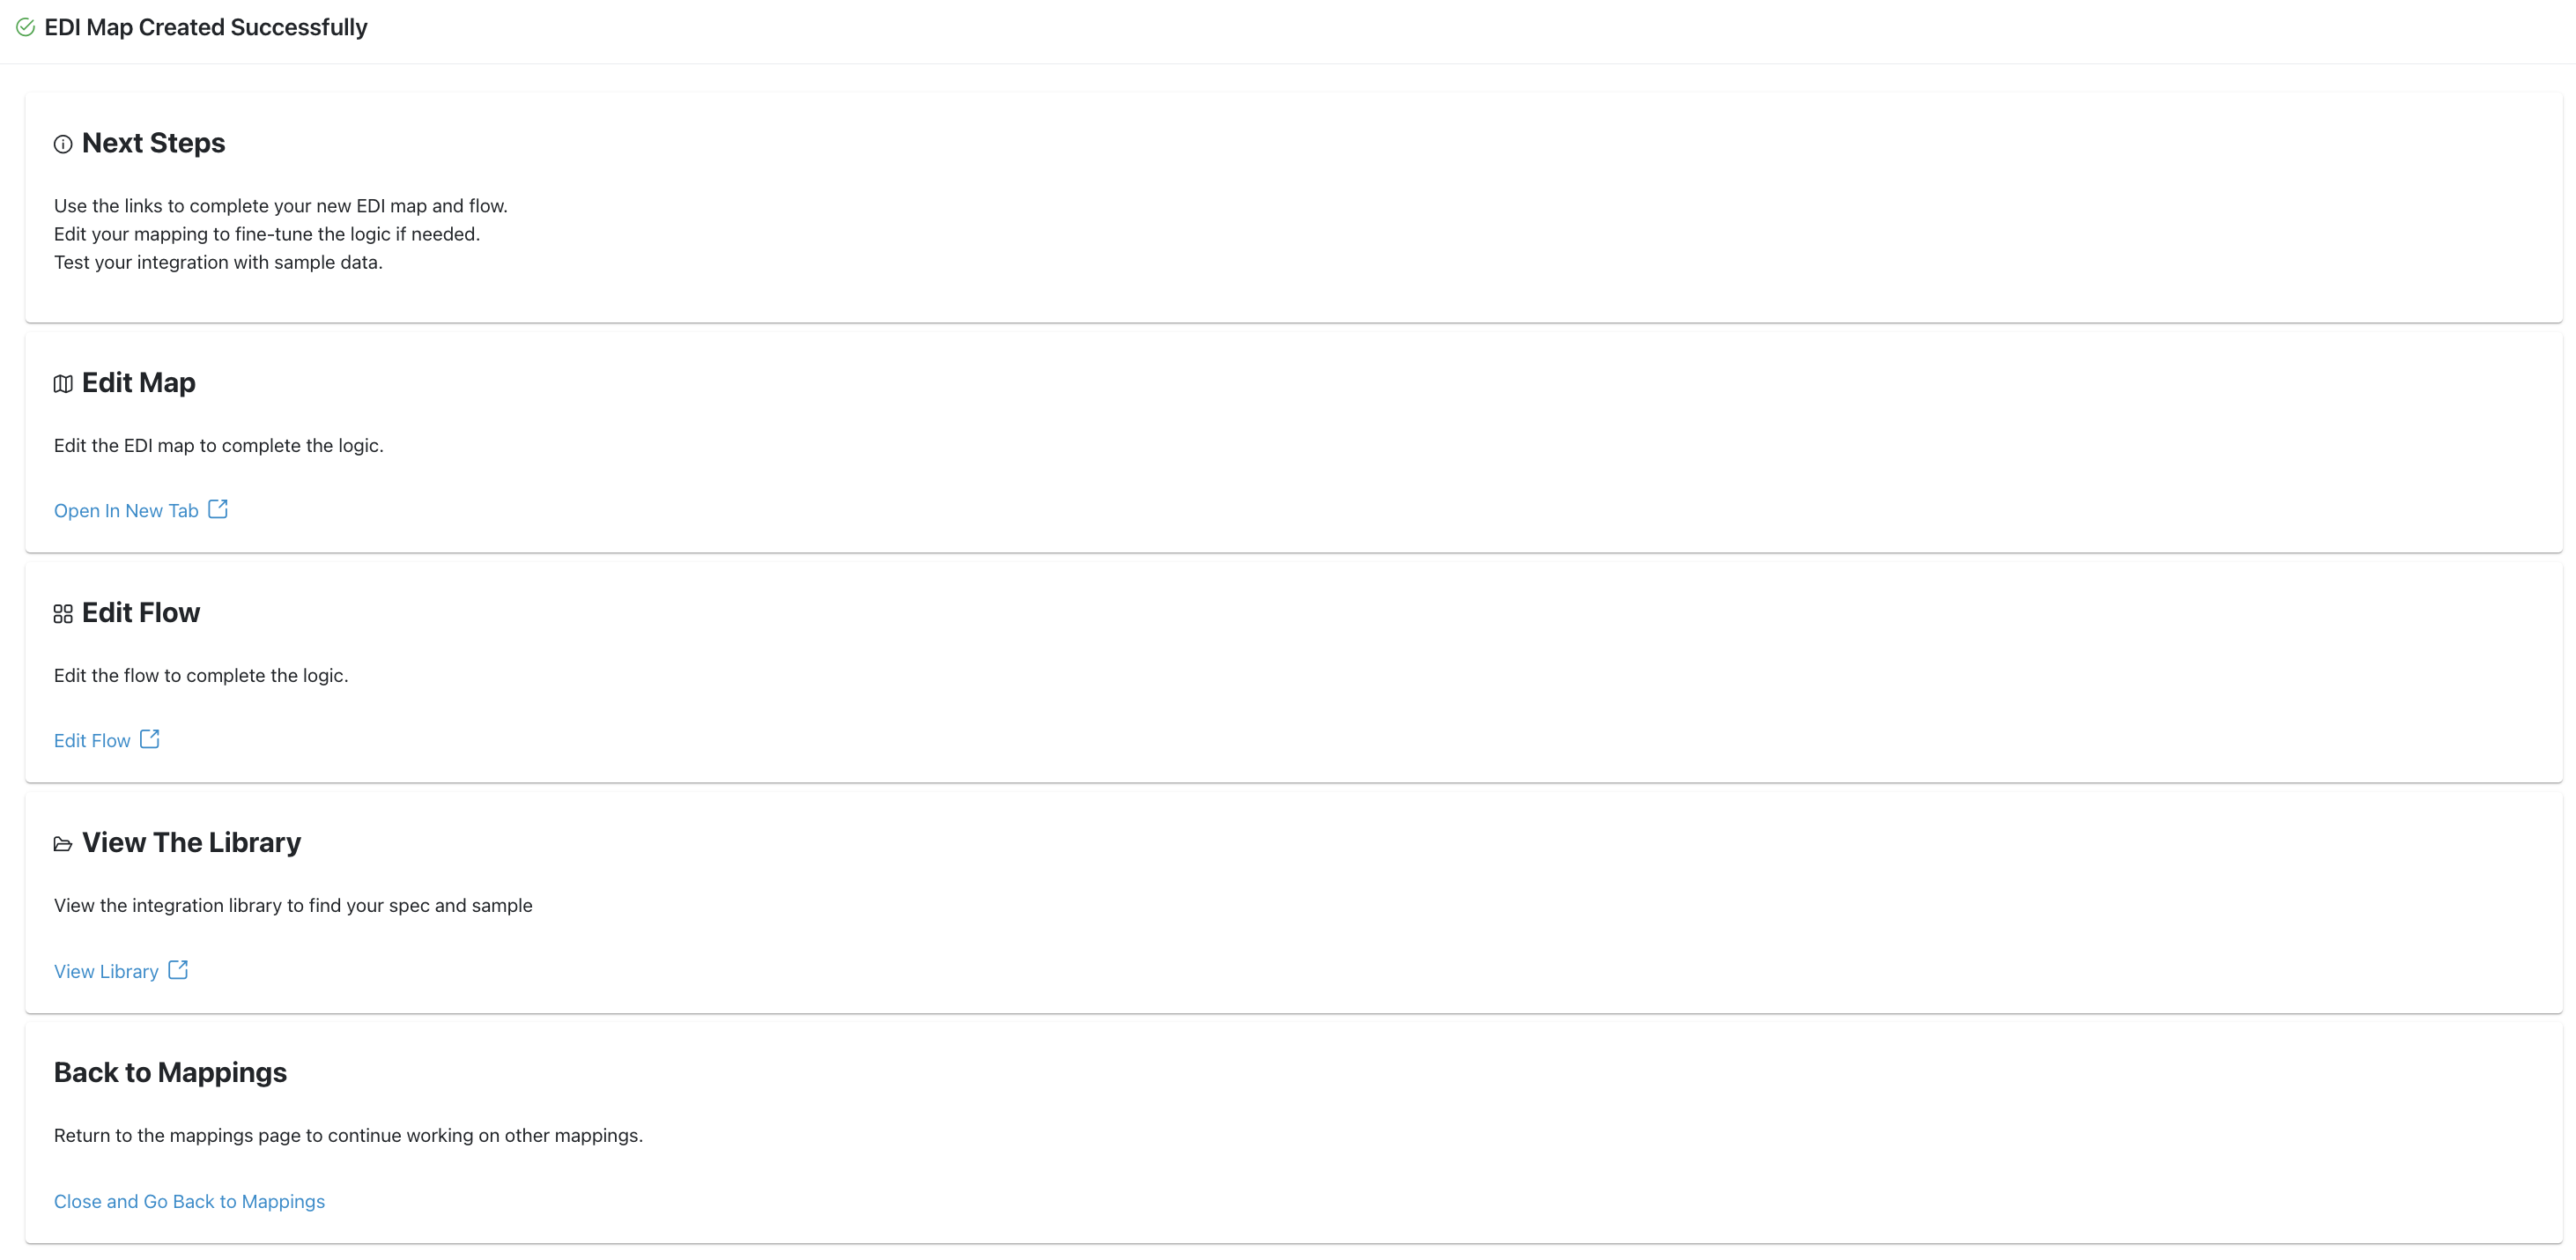
Review the information and links on the EDI Mapper confirmation page. View the suggested next steps.
Keep this browser window open for reference as you progress through the remaining steps to configure the mapping.
Editing the Custom Mapping
- Under the Edit Map subsection, click the Open in New Tab link to edit the EDI mapping within the Custom Mapping Tool.
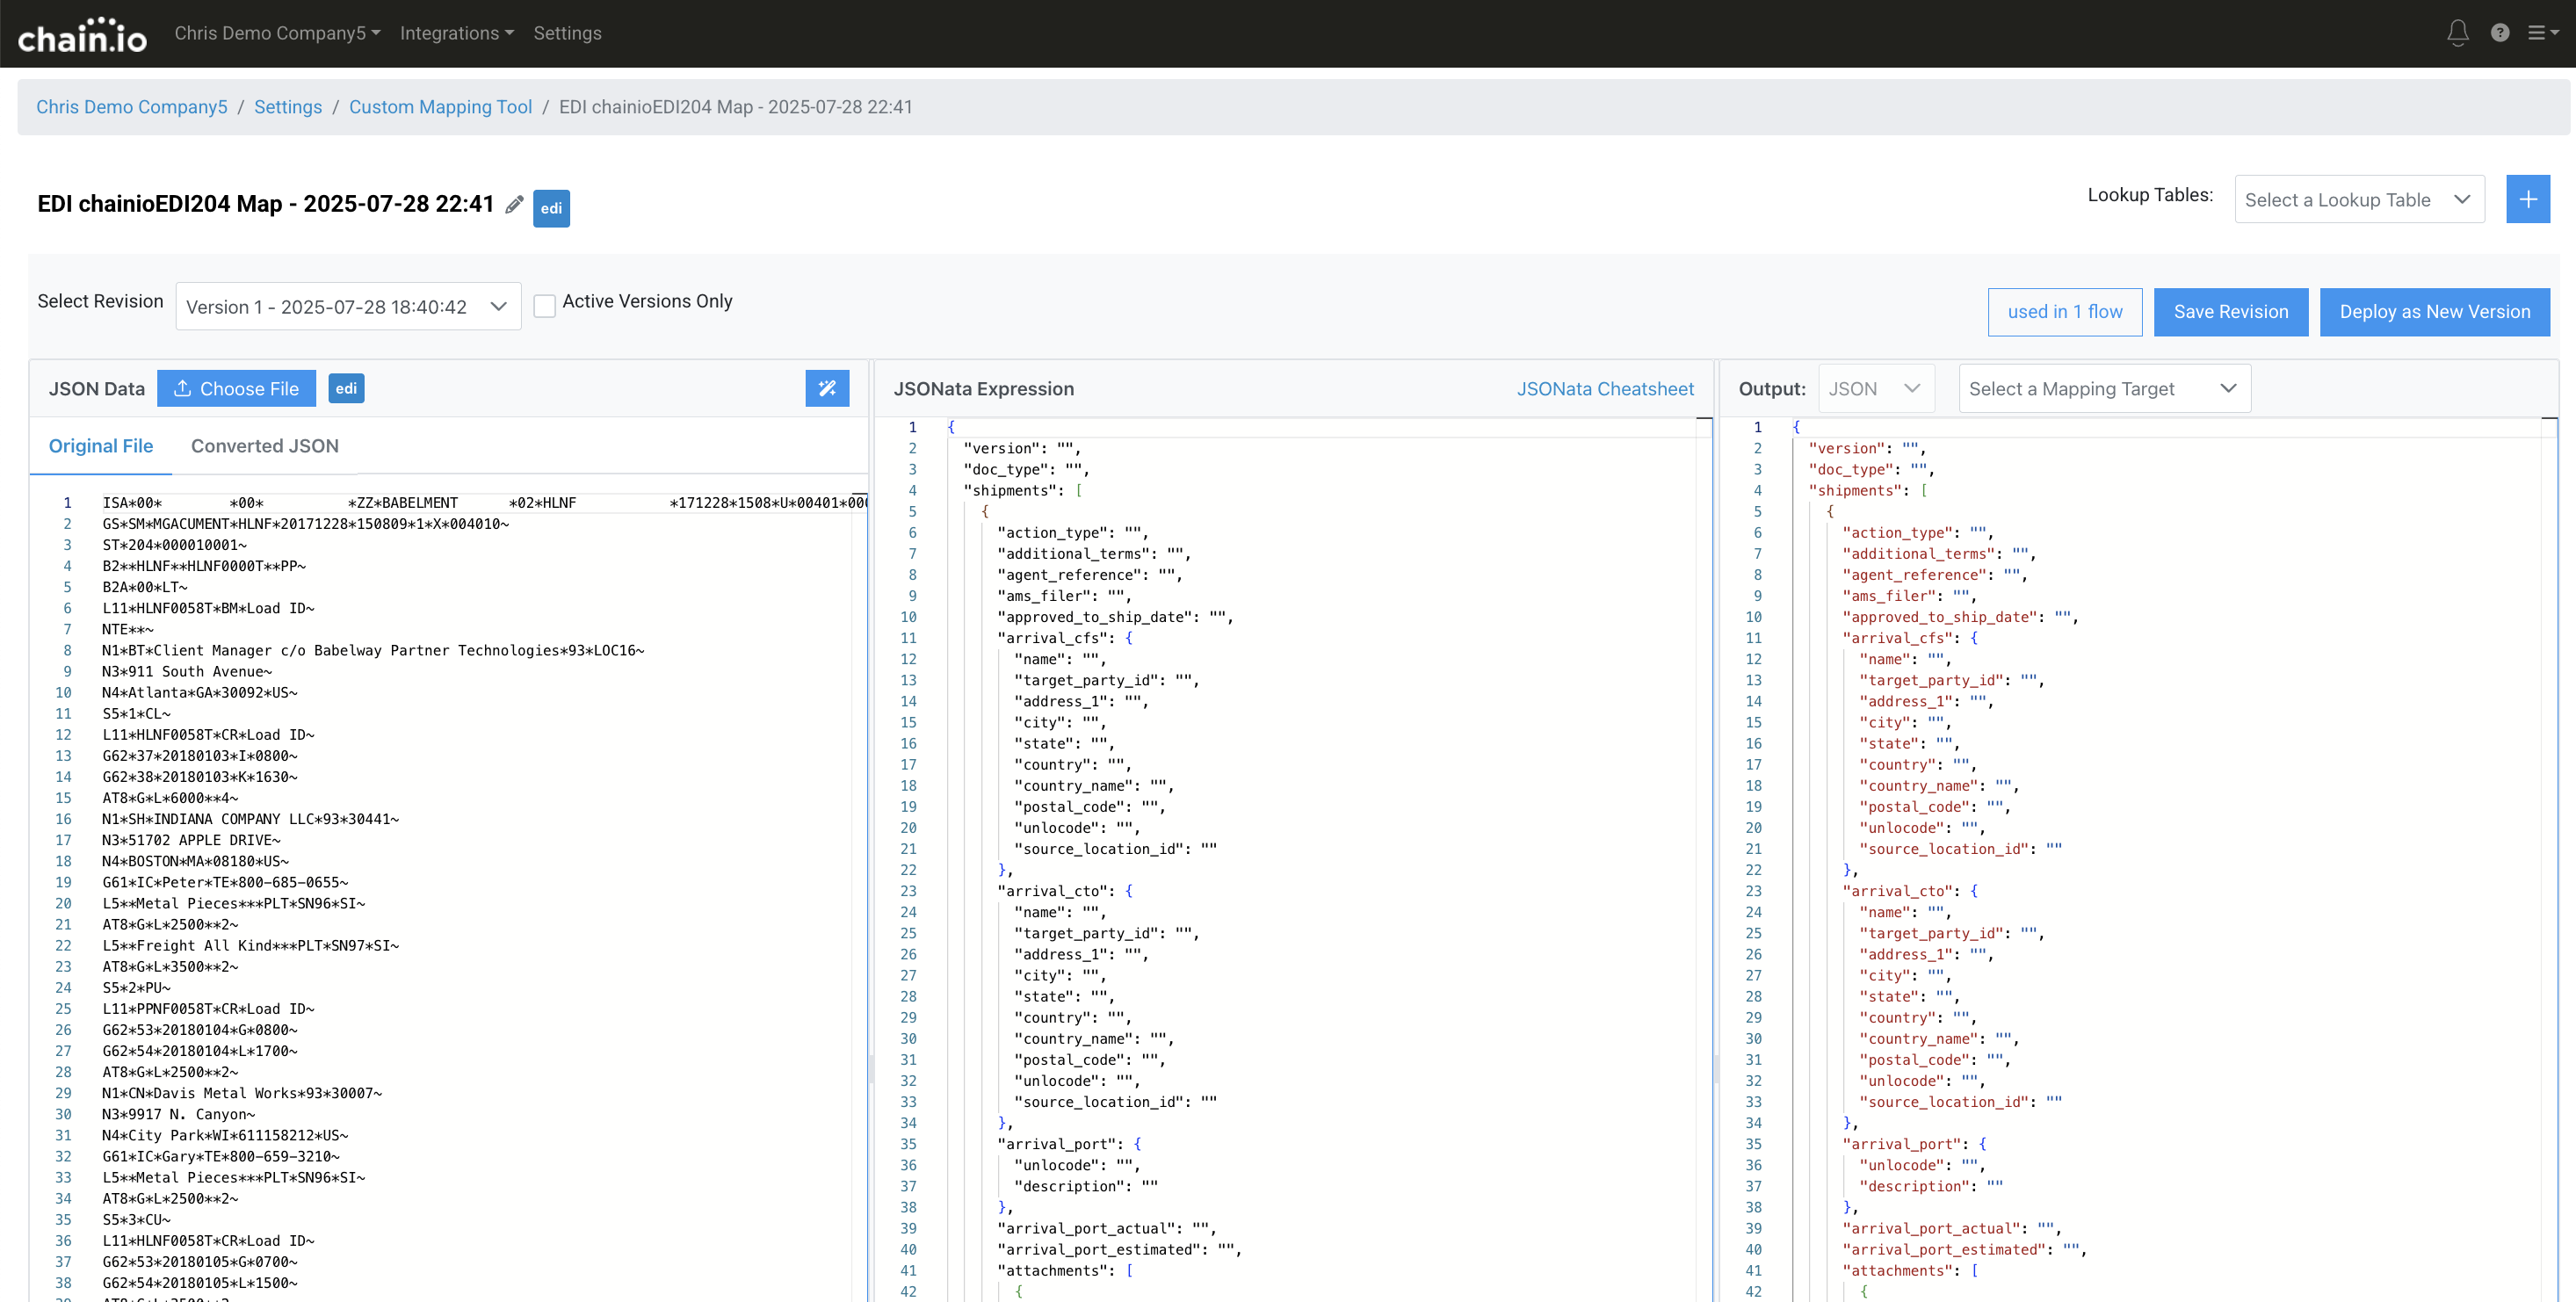
- In the Output panel (3rd column), click the Select a Mapping Target drop-down menu and select the desired output file type for your use case.
Example
For this example, Booking Response was selected as the mapping target output file type.
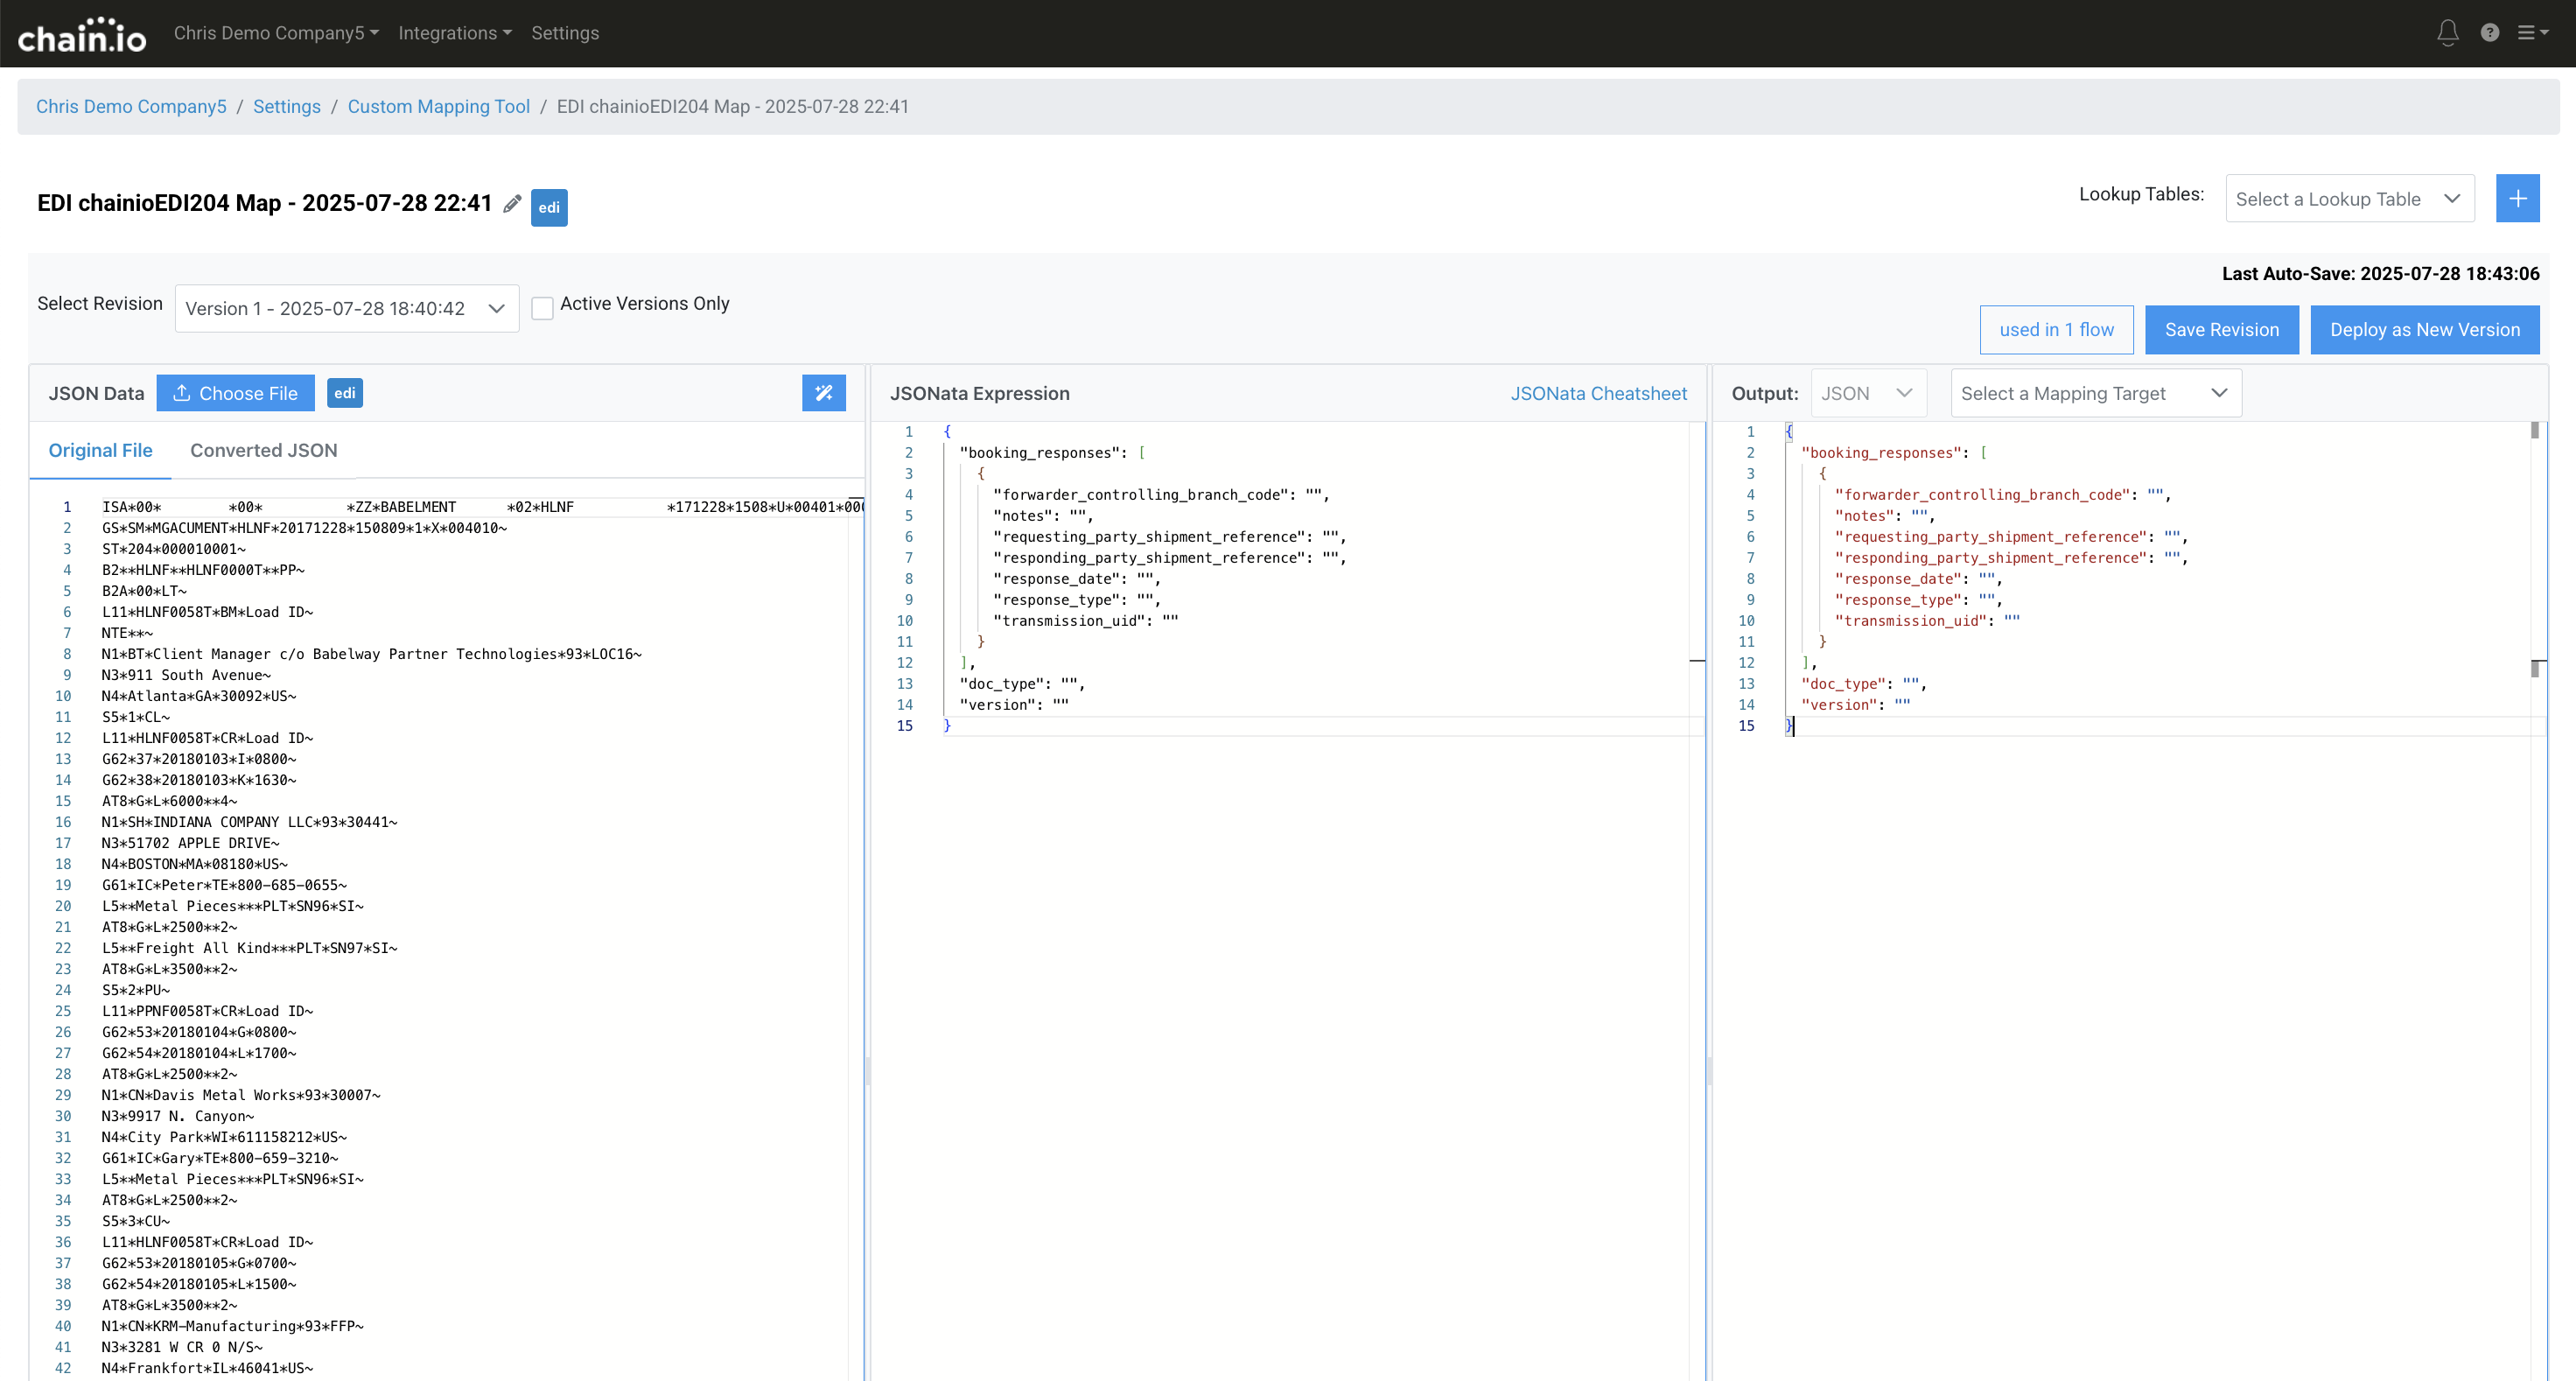
- Edit the JSONata expression in the JSONata Expression panel (2nd column) to fit your use case.
- In the upper right of the page, click Save Revision.
- In the same region, click Deploy as New Version to make the mapping available for use in a Flow.
Editing the Flow Configuration Settings
- On the EDI Mapper confirmation page, under the Edit Flow subsection, right click the Edit Flow link to open the link in a new browser window.
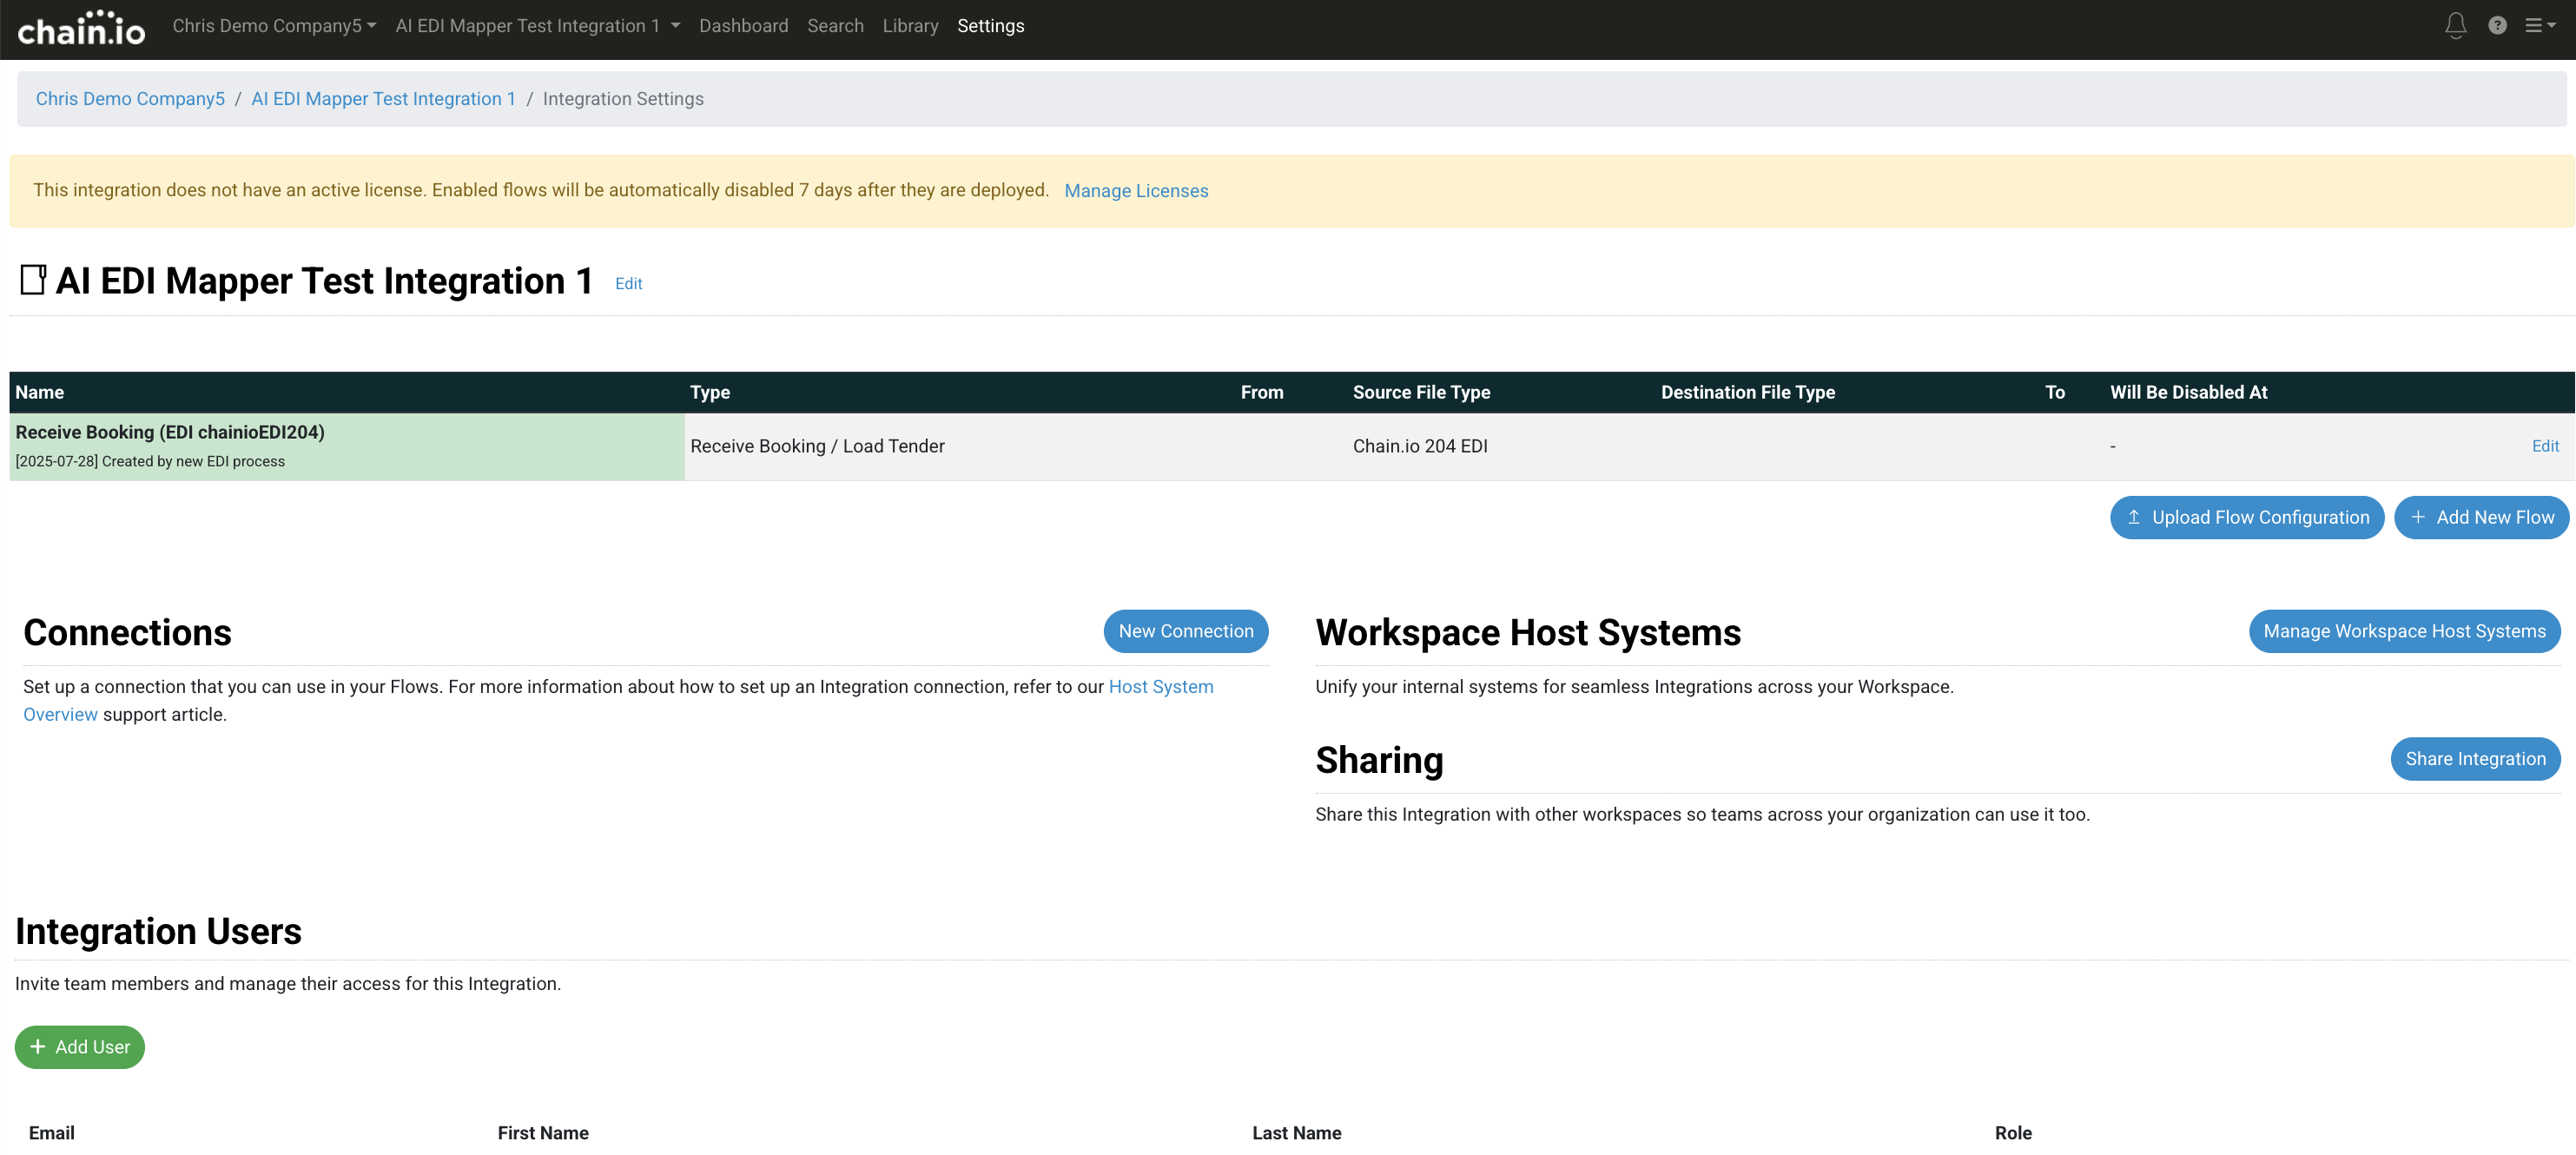
Click Edit to the right of the Flow to edit the Flow configuration settings.
After generating the mapping through the AI EDI Mapper, required subsections of the Flow configuration settings may have red banners. At a minimum, these settings must be configured before executing the Flow. Aside from these red banners, update additional Flow configuration settings as necessary for your use case.- Scroll down to the Source Connection subsection and click the banner to expand.

- In the Select Connection pop-up window, click the green Add New Connection button to specify a source connection.

- Select the appropriate connection type and complete the required fields for your use case.
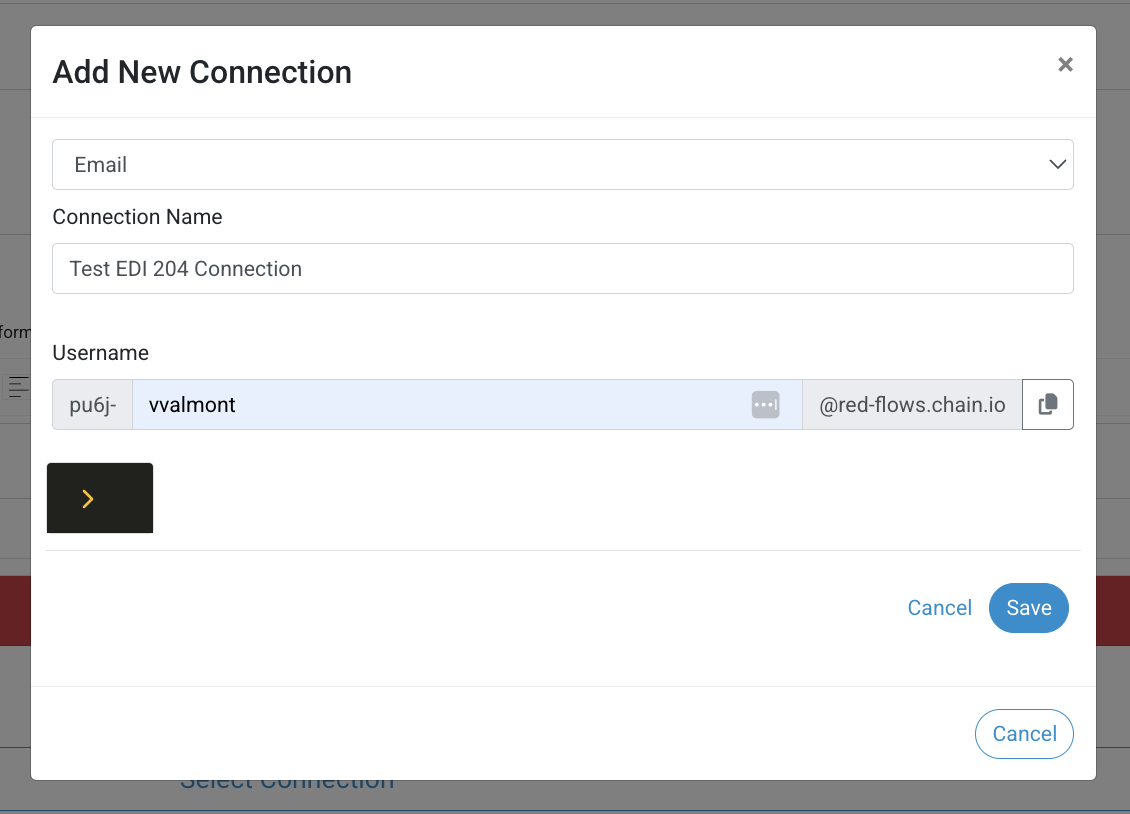
Example
For this example, an email connection was selected.
- Click the blue save button to confirm the selection.

- Scroll down to Destination File Type subsection and click the banner to expand.

- Click Select under the file type that fits your use case.
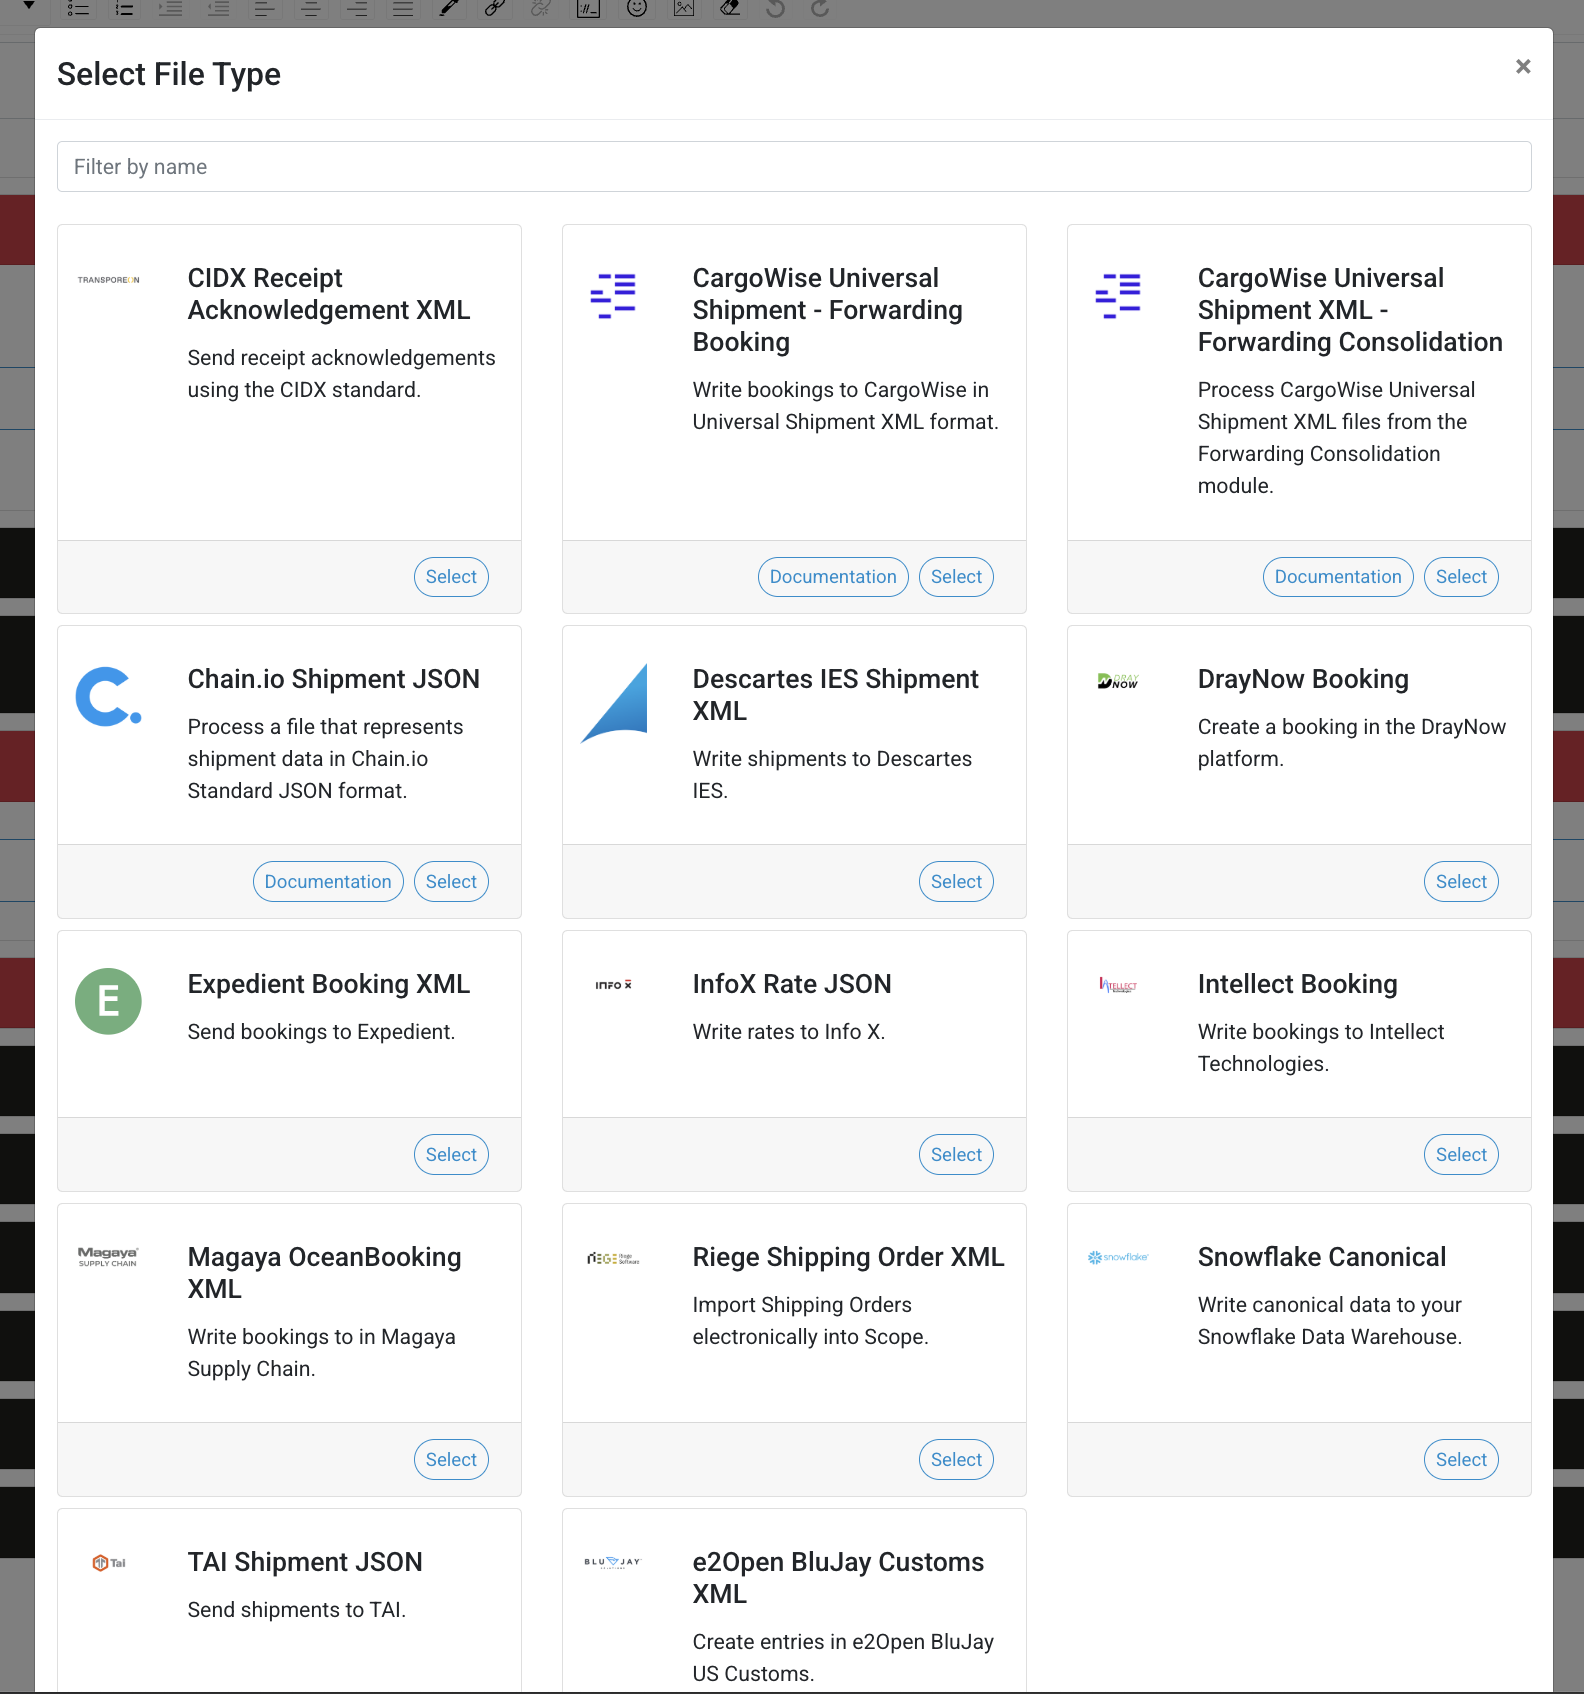
Example
For this example, Chain.io Shipment JSON was selected.

- Scroll down to the Destination System subsection and click the banner to expand.

- Select a Host System from the list of your existing host systems, or click the green Add New Host System button.
Example
For this example, No Action was selected.

- Complete any additional Flow configuration settings required for your use case.
- Within the Actions menu on the right side of the page, click Save to save your Flow configuration settings.
Within the same menu, click Deploy to implement the configuration.
Viewing Files in the Library
- On the EDI Mapper confirmation page, under the View the Library subsection, right click the View Library link to open the link in a new browser window.
The files uploaded during the AI EDI Mapper process are available in the Files subsection.
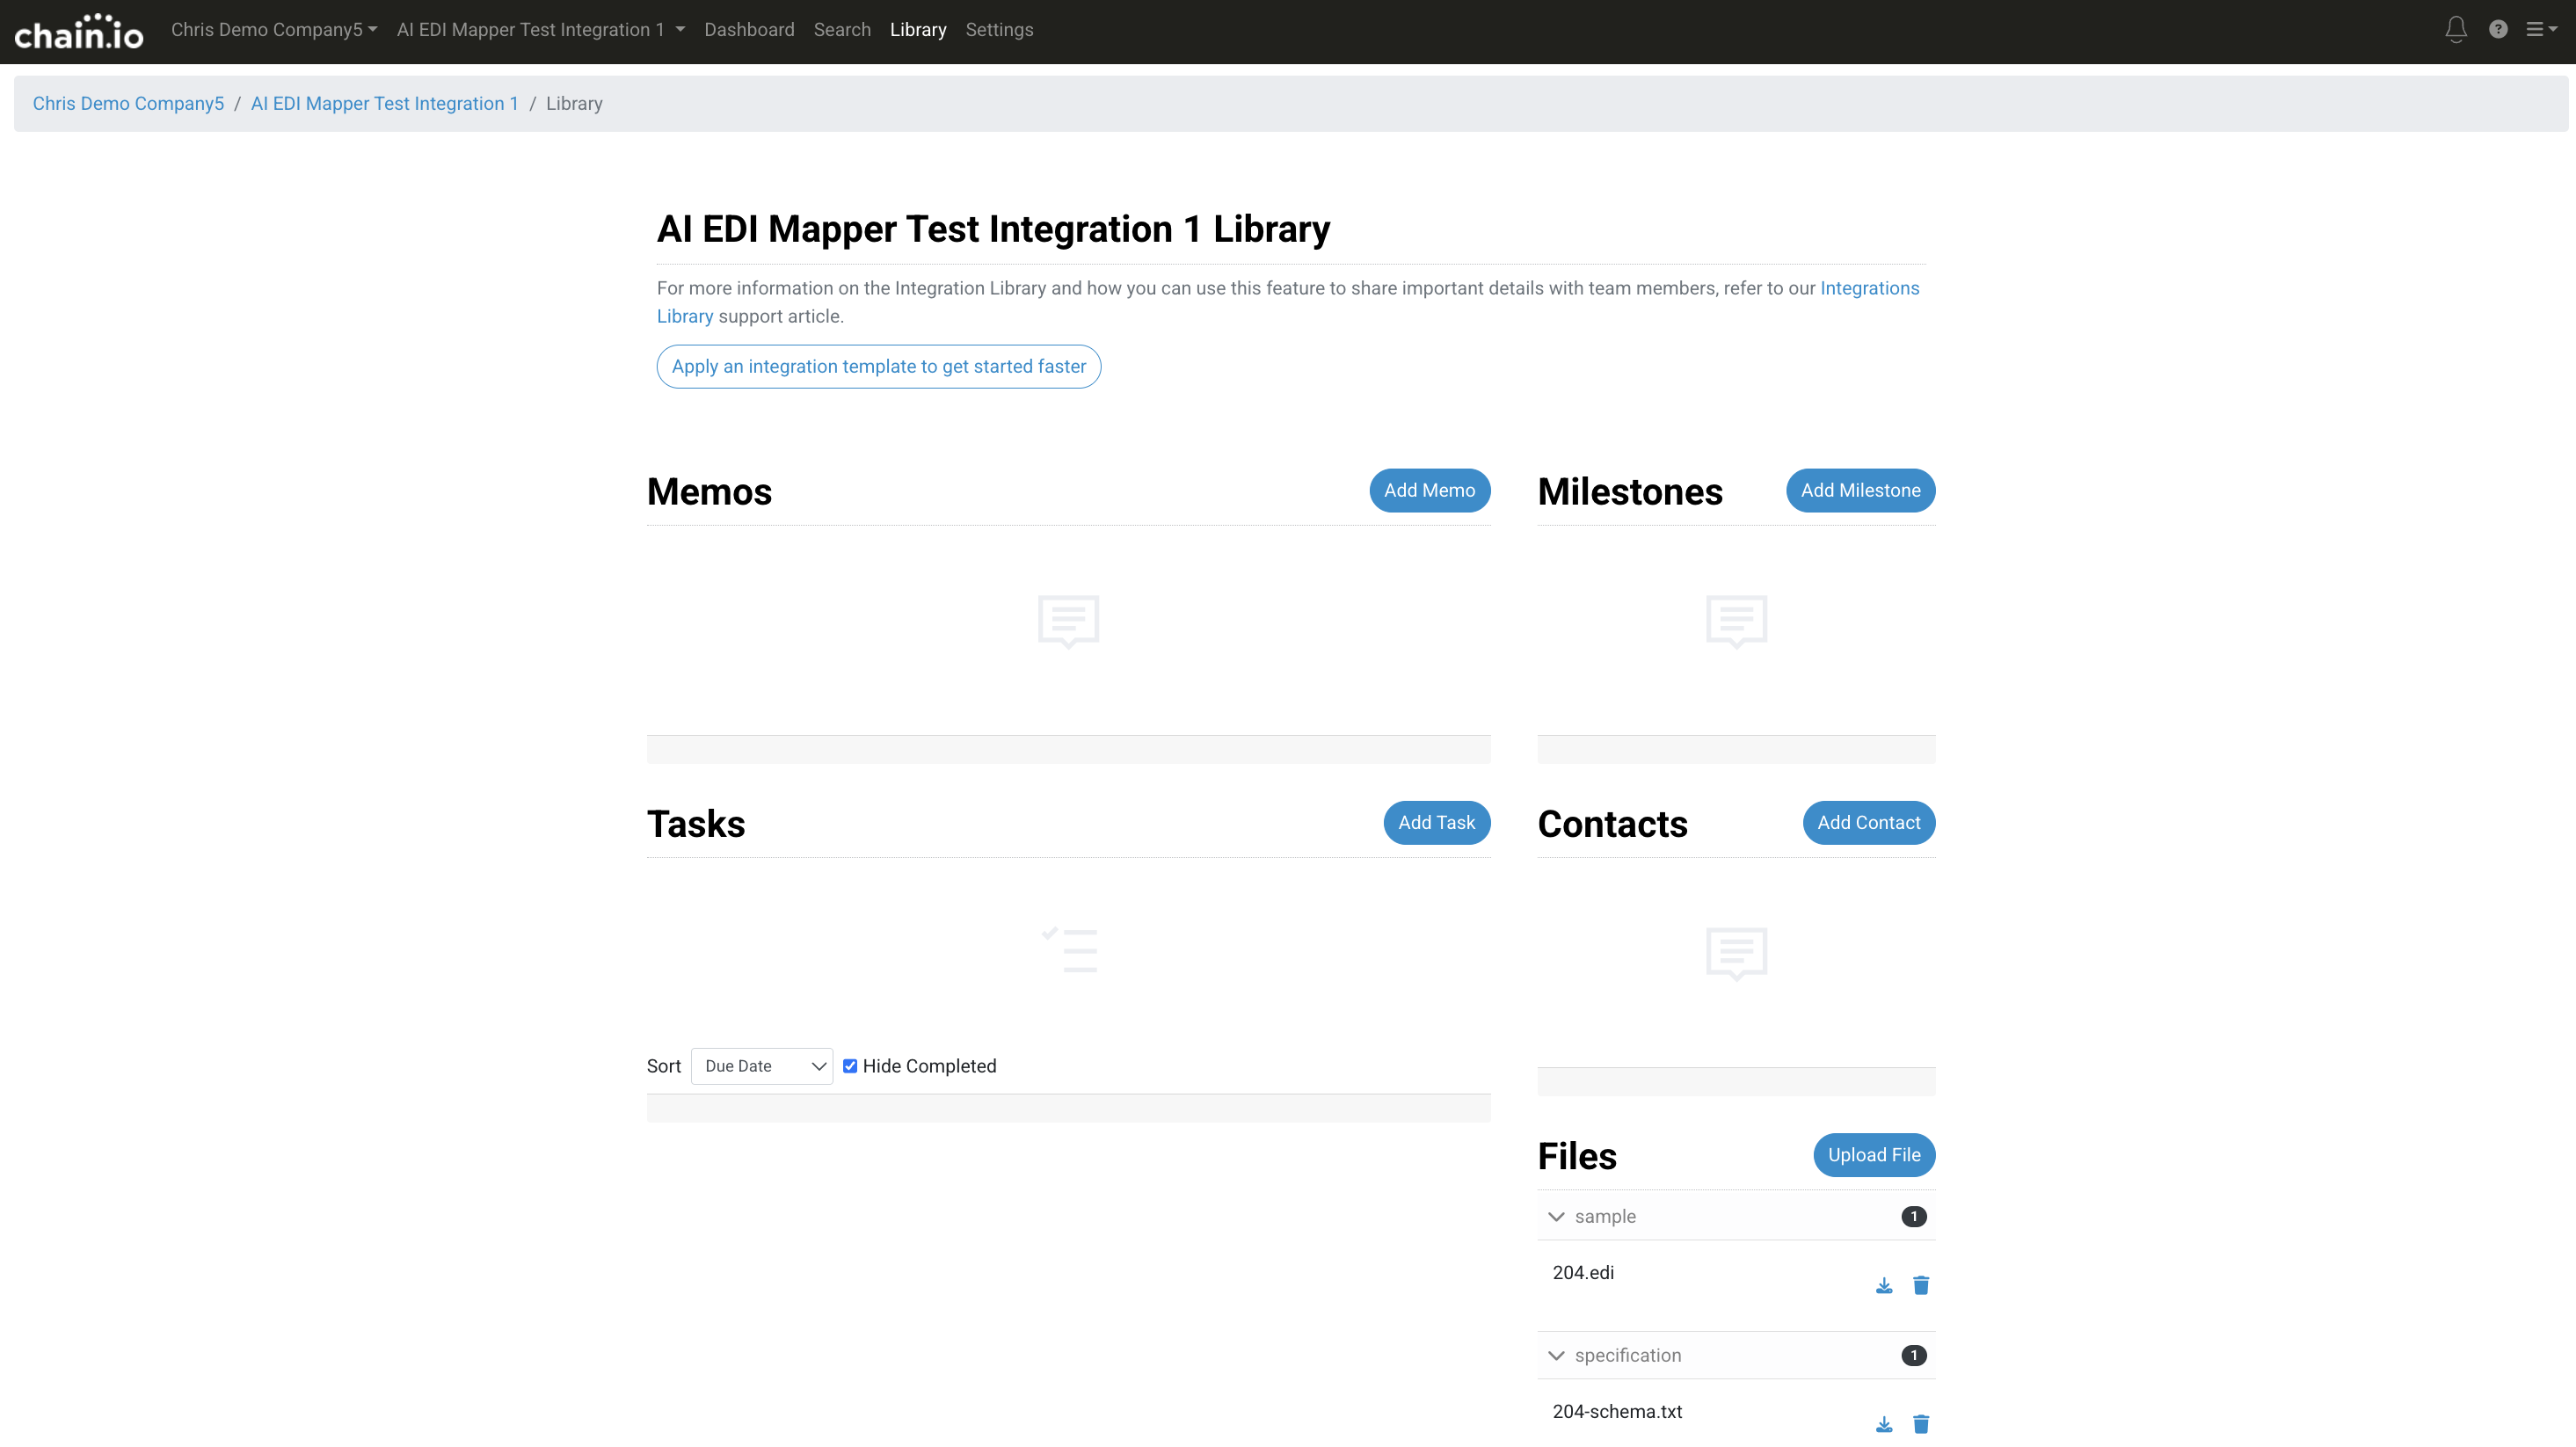
- On the EDI Mapper confirmation page, under the Back to Mappings subsection, click the Close and Go Back to Mappings link to return to the Workspace Maps page.
Attached Files Referenced in the EDI File Types Table
These files are included for the EDI File Types table above to reference.
Was this article helpful?
That’s Great!
Thank you for your feedback
Sorry! We couldn't be helpful
Thank you for your feedback
Feedback sent
We appreciate your effort and will try to fix the article