TABLE OF CONTENTS
Introduction
Converting between EDI and JSON data formats is a feature the Chain.io portal is able to support through the custom mapping feature. This is essential for integrating different systems and partners in your workflows. This guide explains how to perform these conversions and how they are implemented into your Flows.
This documentation is split into two sections. Converting EDI to JSON and Converting JSON to EDI. Both paths require referencing outside resources and work on the assumption that you have all your EDI/JSON information at hand. Including any specific data schemas or mapping guides that may not be accessible to parties outside of your organization.
This guide relies heavily on the use of the Chain.io Custom Mapping feature and it is helpful to have a familiarity with how it works, specifically how it uses JSONata to map data. Please review our product documentation on the feature as well as the documentation for JSONata functionality.
Best Practices
To ensure successful implementation:
- Always test thoroughly with sample data before going live
- Document your mapping decisions for future reference
- Use descriptive names for your mappings and versions
- Keep copies of your source and target format specifications
- Monitor initial productions runs closely
Converting EDI to JSON
Overview
The process of converting EDI messages to JSON involves creating a mapping between your EDI file format and our standardized JSON structure.
Two ways of translating files within the portal are by using the Custom Mapping Tool or Custom Processors.
EDI source files cannot be generated or translated in pre- and post-processors; however, they can be modified in the Custom Mapping Tool for translating or mapping data from the EDI file into a JSON-formatted output file.
We recommend using the Custom Mapping Tool for modifying EDI source files and then, employing the custom mapping in a Flow instead of attempting modifications to an EDI source file in the pre- or post-processors section of the Flow settings.
Preparation
Determine the following before creating a custom mapping for EDI file formats:
- Select the appropriate sample EDI file. This can be one provided by your customer or trading partner.
- Identify the target JSON specification needed in your Flow output. This is the target JSON specification to which you are mapping. The target output must be a format compatible with the Chain.io portal. The options are JSON, CSV, and XML.
Accessing the Custom Mapping Tool
To utilize Chain.io's Custom Mapping tool, first sign in to your Chain.io portal account at https://portal.chain.io/.
- At the top menu bar, click Workspaces.
- At the top right of the screen, click Workspace Settings from the hamburger menu.
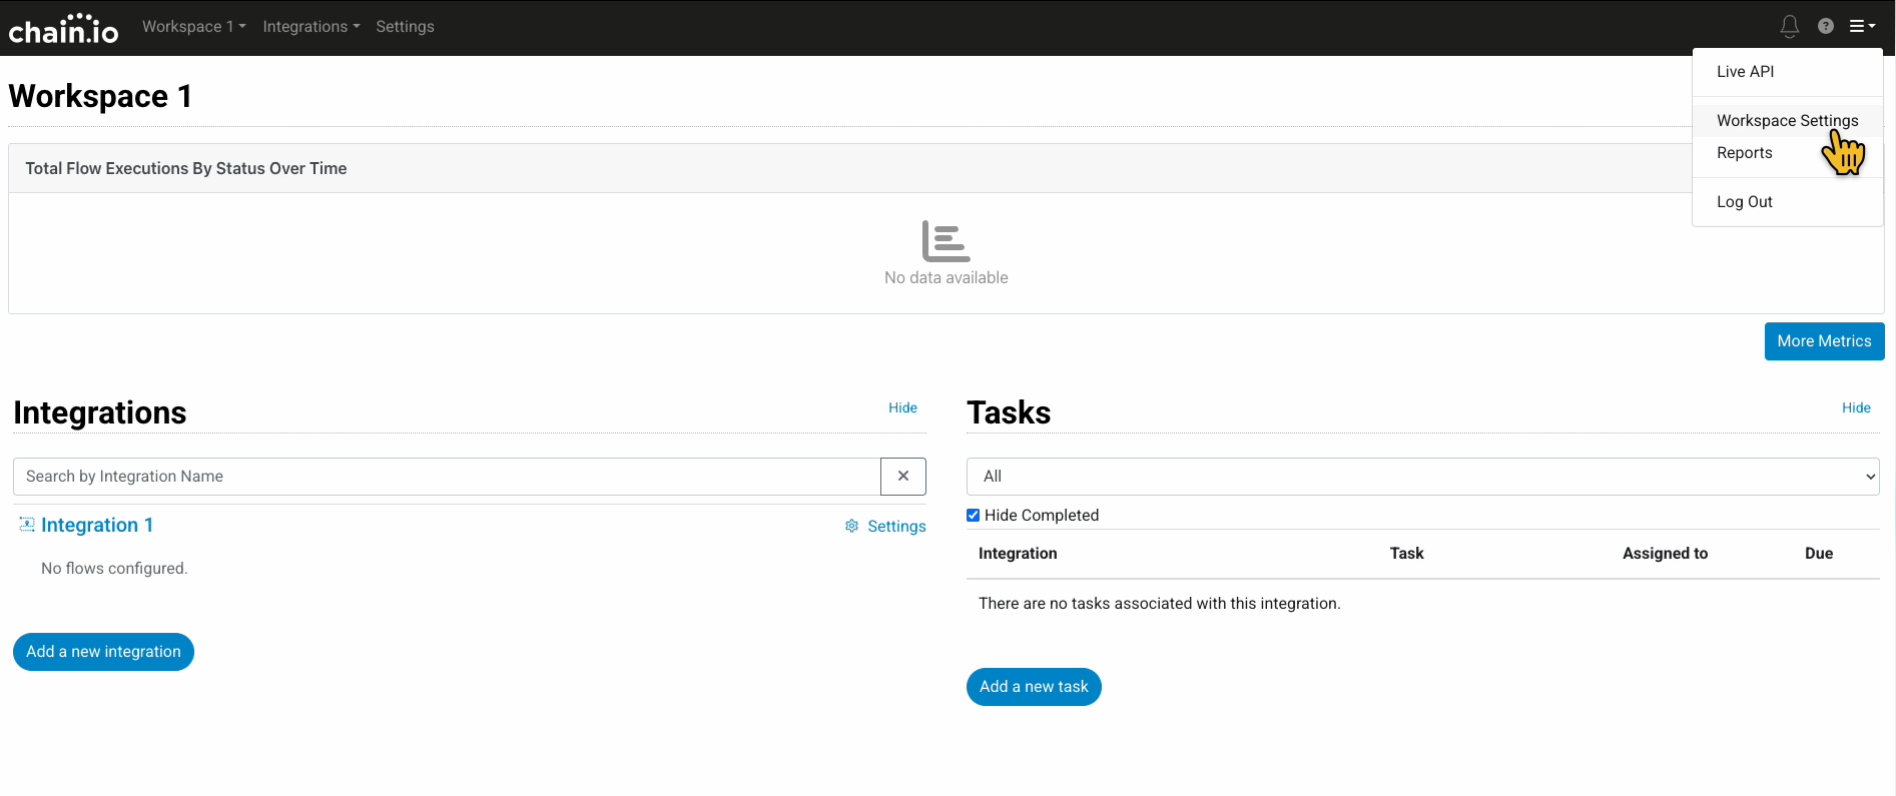
- Navigate to the Developer Center subsection.
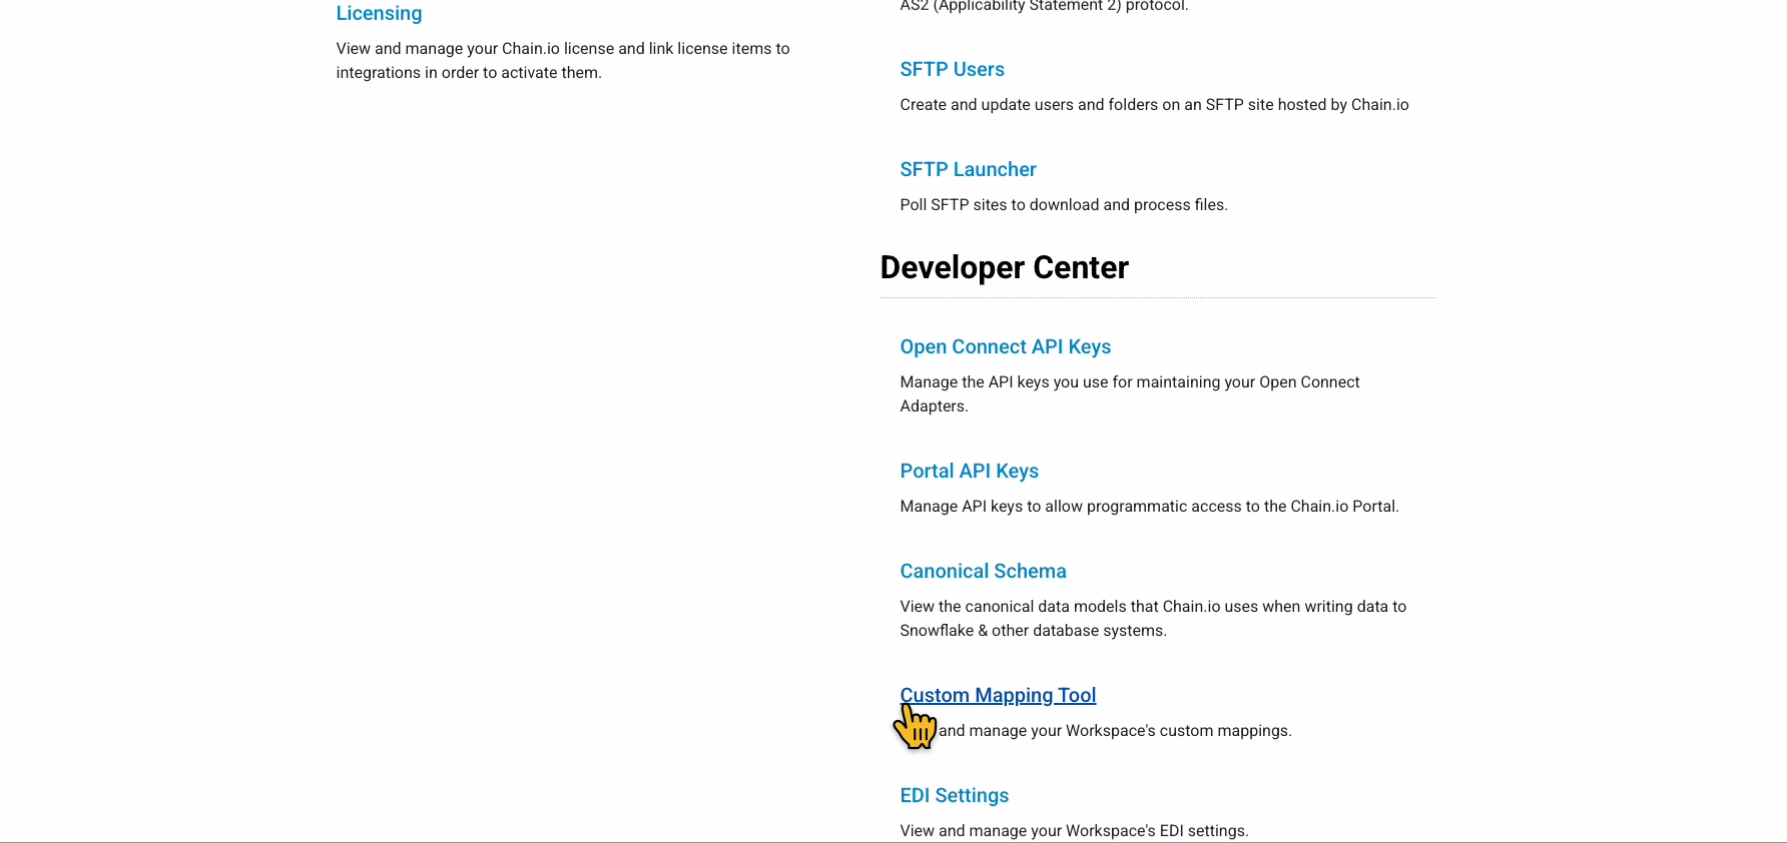
- Select Custom Mapping Tool.
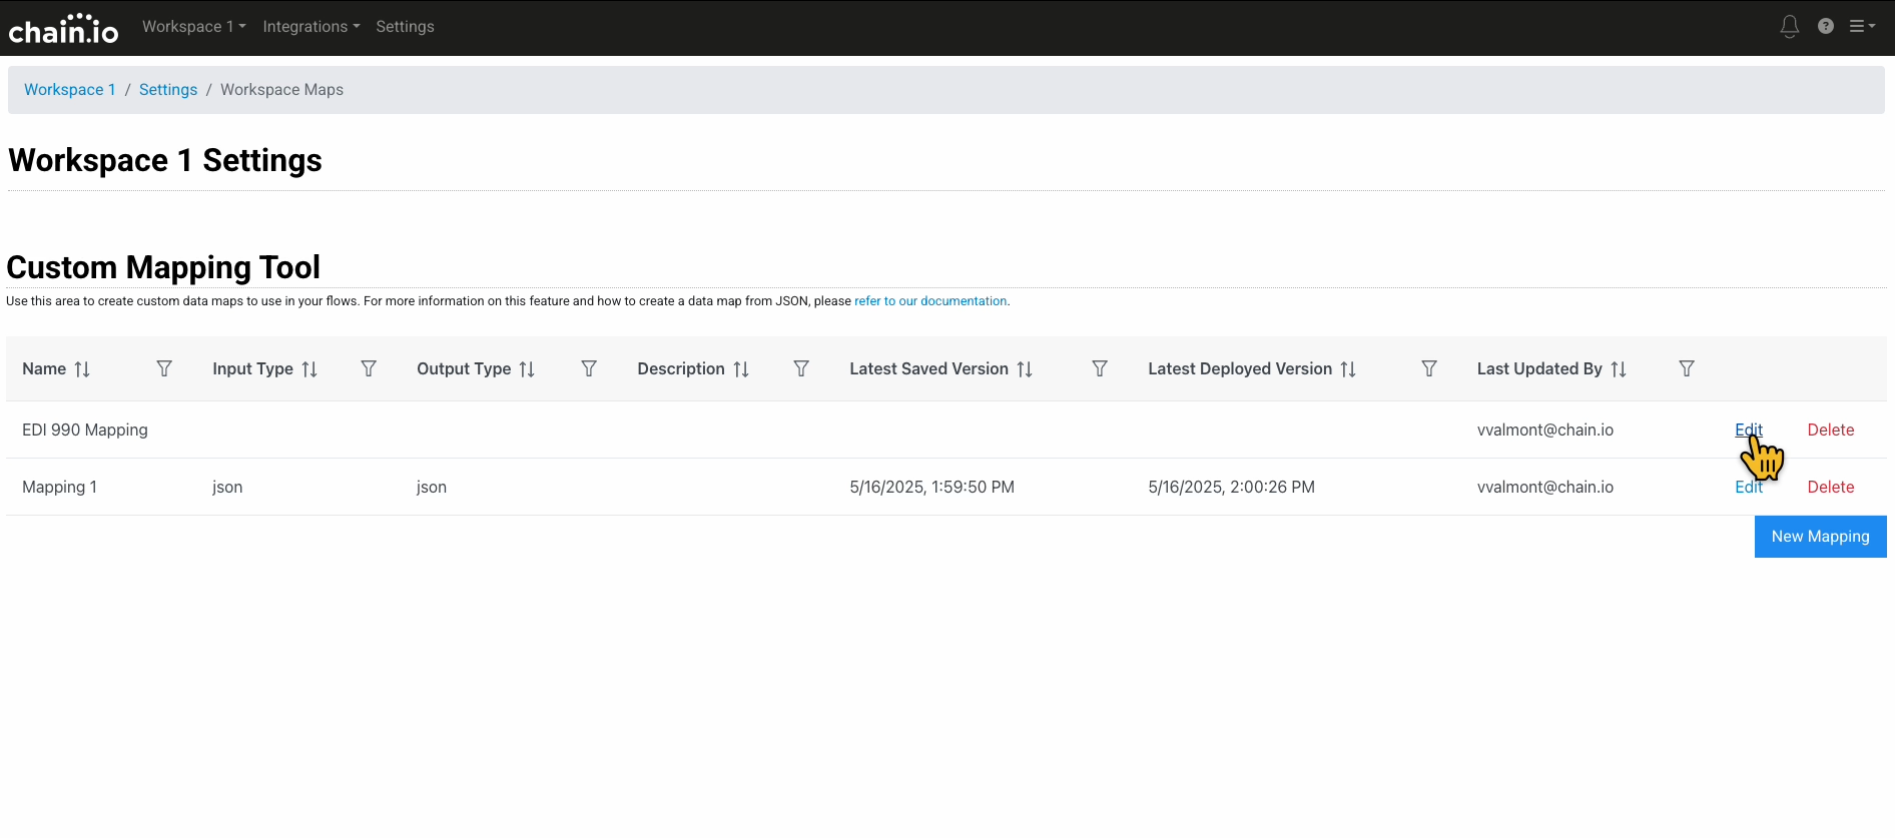
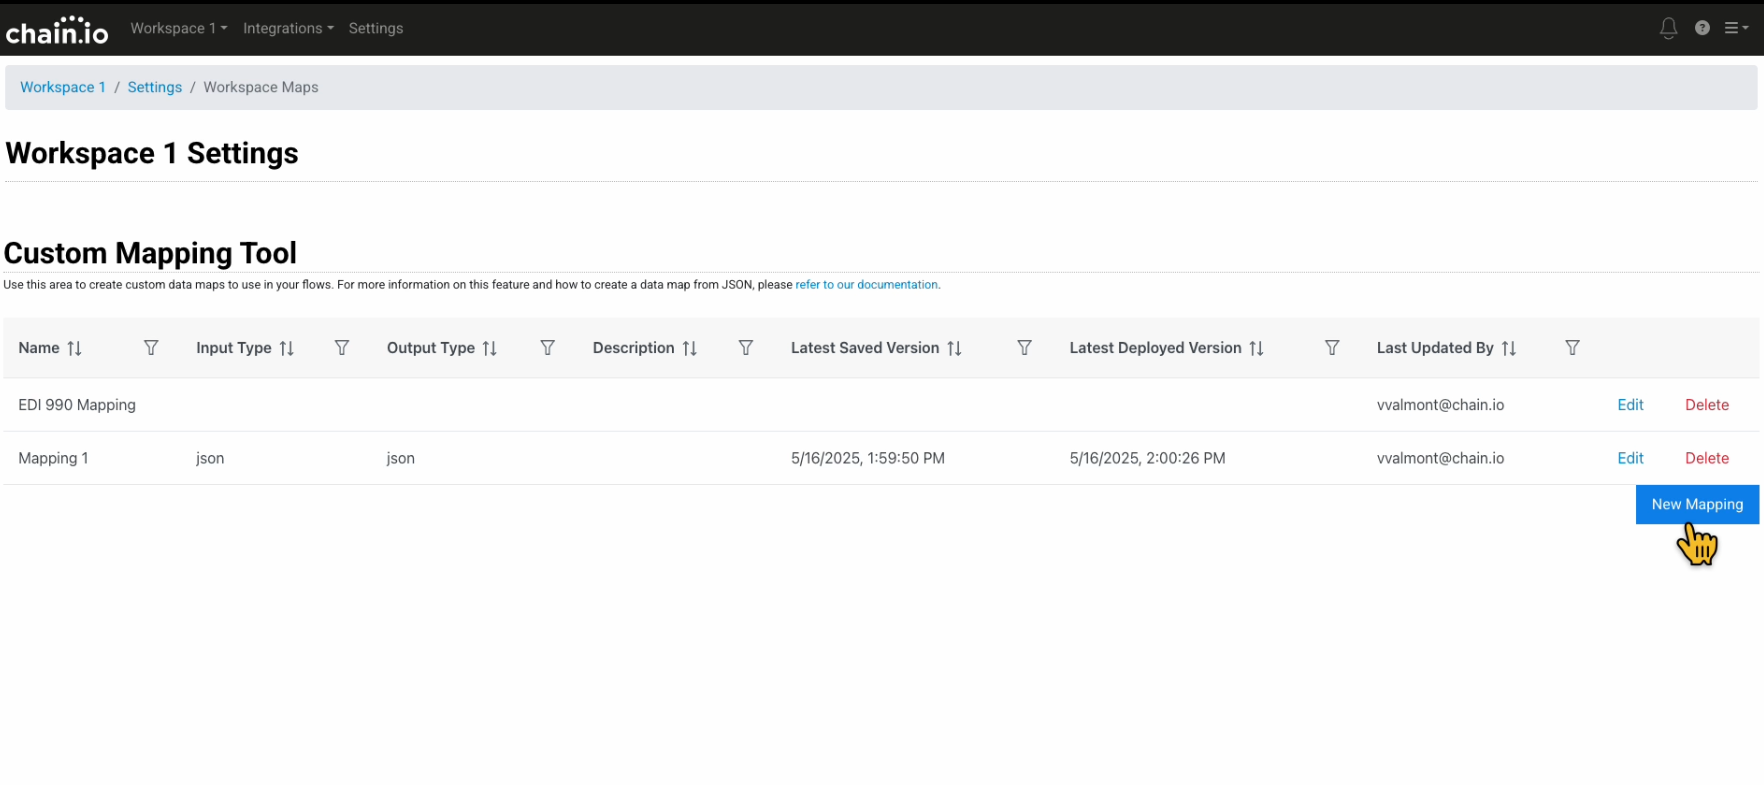
Use the Custom Mapping tool to create, edit, and manage your data mappings. If you have an existing mapping, it will appear in the table on the Workspace Maps page. - Click on an existing mapping to edit it in the Custom Mapping Tool or create a new mapping.
Creating the EDI to JSON Mapping
Use the following steps to create your EDI to JSON mapping:
- Create a new mapping by clicking the blue New Mapping button in the bottom right corner of the Custom Mapping Tool page.
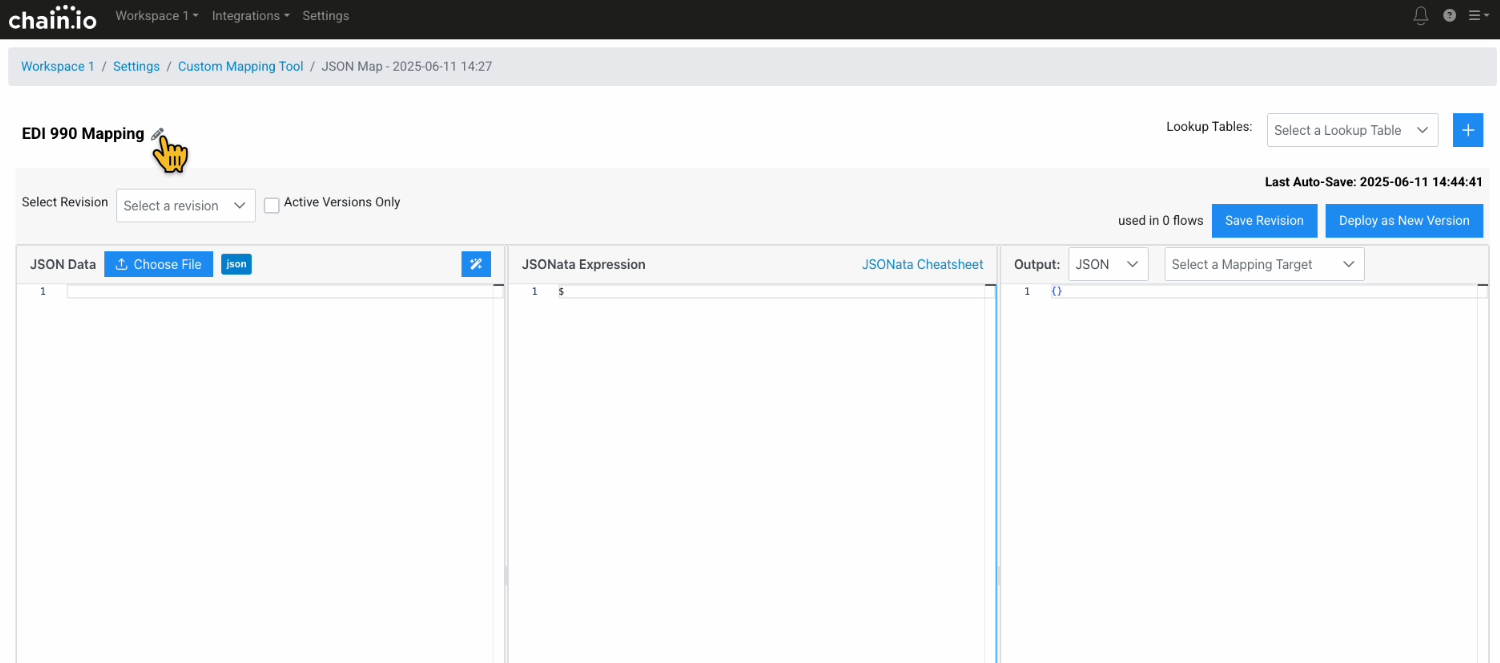
- You can edit the mapping's name by clicking the pencil icon. Provide a descriptive name for your mapping so it is easily identifiable in your Flow Configurations.
Building the EDI to JSON Translation
The Custom Mapping Tool displays three columns:
- Input (1st/left column) - Input your source data in this column either by uploading a file or copying and pasting your data directly into the column. Accepted formats are EDI, CSV, JSON, and XML.
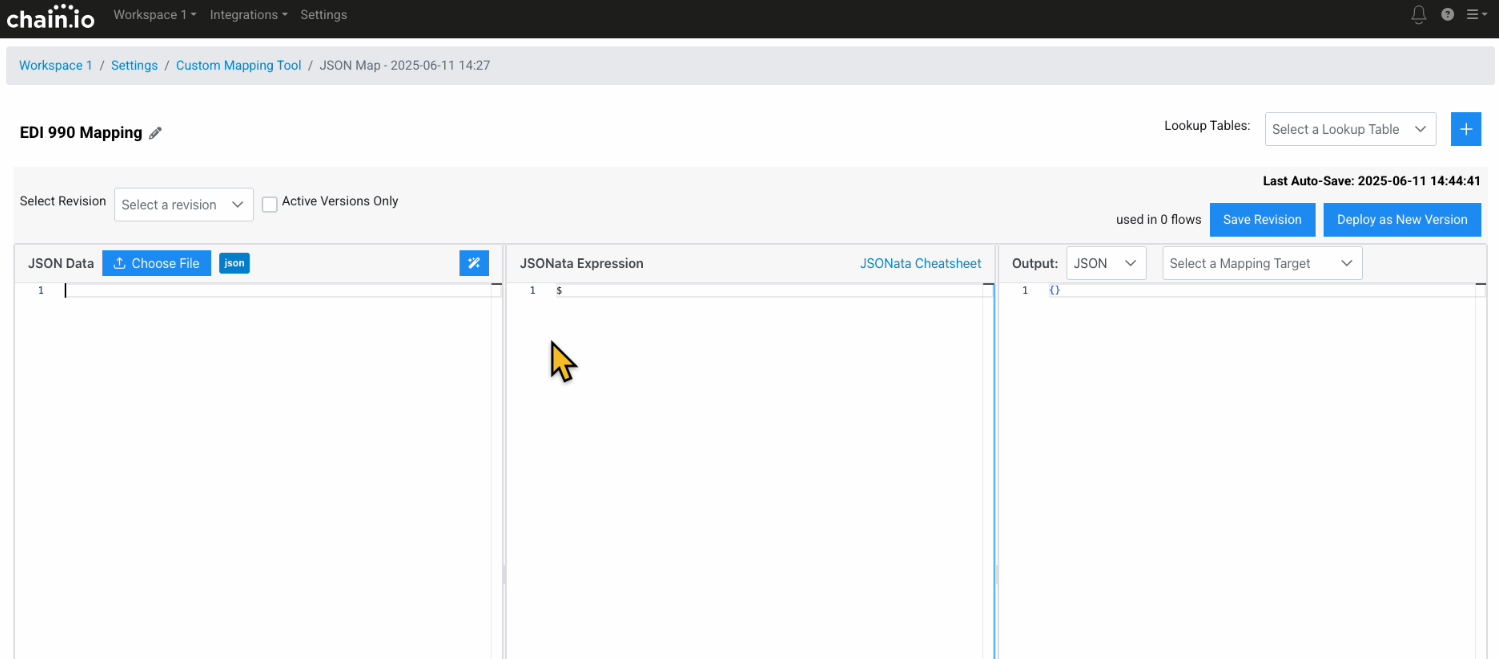
- JSONata Expression (2nd/middle column) - Your JSONata transformation logic template will appear automatically in this column after you select an output file type in the third panel on the right. Write your JSONata expressions for mapping your data in this column. Refer to our Guide to JSONata Mapping Expressions for more information on how to craft JSONata expressions.
- Output (3rd/right column) - The results of your mapping and adjustments to your JSONata expression will appear in this column in real-time.
To build your EDI to JSON translation:
- Upload your sample EDI-like JSON formatted file by copying and pasting the EDI data into the input panel on the left, labeled "JSON Data".
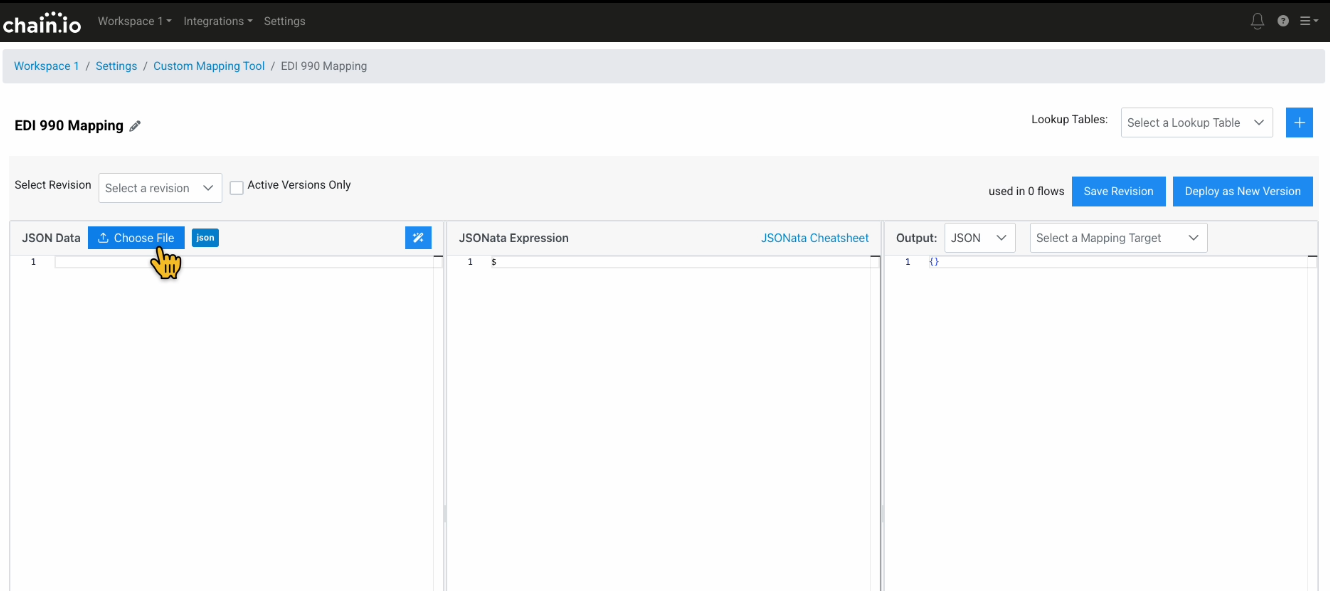
The JSON document will appear in the left and right panels.

- In the Output panel on the right, select a Mapping Target from a list of common logistics file formats. The JSONata Expression panel will automatically populate.

- Specify your mapping rules in the center JSONata Expression panel.

- Click Save Revision to save an edition of your custom mapping. Click Deploy as New Version to deploy the current version of the mapping and make it usable in Flow configurations.
Converting JSON to EDI
Creating the Mapping
Follow these steps to create your JSON to EDI mapping:
Log into your Chain.io workspace at https://portal.chain.io/
Navigate to Workspace Settings
Select Custom Mapping

Click New Mapping to begin

Click the pencil icon to give your Mapping a name. Provide a descriptive name for your mapping so it is easily identifiable in your Flow Configurations later.

Building the Translation
The mapping interface consists of three panes:
- Left Pane: Your source EDI-like JSON
- Center Pane: Your mapping logic where you enter JSONata functions
- Right Pane: Preview of the output

To build your translation:
Upload your sample EDI-like JSON using the Choose File button

Choose the Example Chain Standard Document relevant to the target EDI Document
The JSON document will appear in BOTH the left and right panels

Keep your target JSON format open in another window for reference
Create your mapping rules in the center pane using JSONata Expressions
Save your mapping frequently by clicking Save Revision as you go to avoid losing work

Monitor the live preview of your output in the right pane as you progress through your mapping.
Testing and Implementation
When your mapping is complete, create a new version by selection Deploy as New Version. This saves the map so it can be used in Flow Configurations

Was this article helpful?
That’s Great!
Thank you for your feedback
Sorry! We couldn't be helpful
Thank you for your feedback
Feedback sent
We appreciate your effort and will try to fix the article